This exercise walks you through the basic Git workflow using VS Code’s Source Control tab and GitHub’s web interface. By the end, you will have cloned a repository, created a branch, made changes, and merged them back.
Content developed by Ben Rambo-Martin
Prerequisites
1. Clone the Repository
- Open VS Code.
-
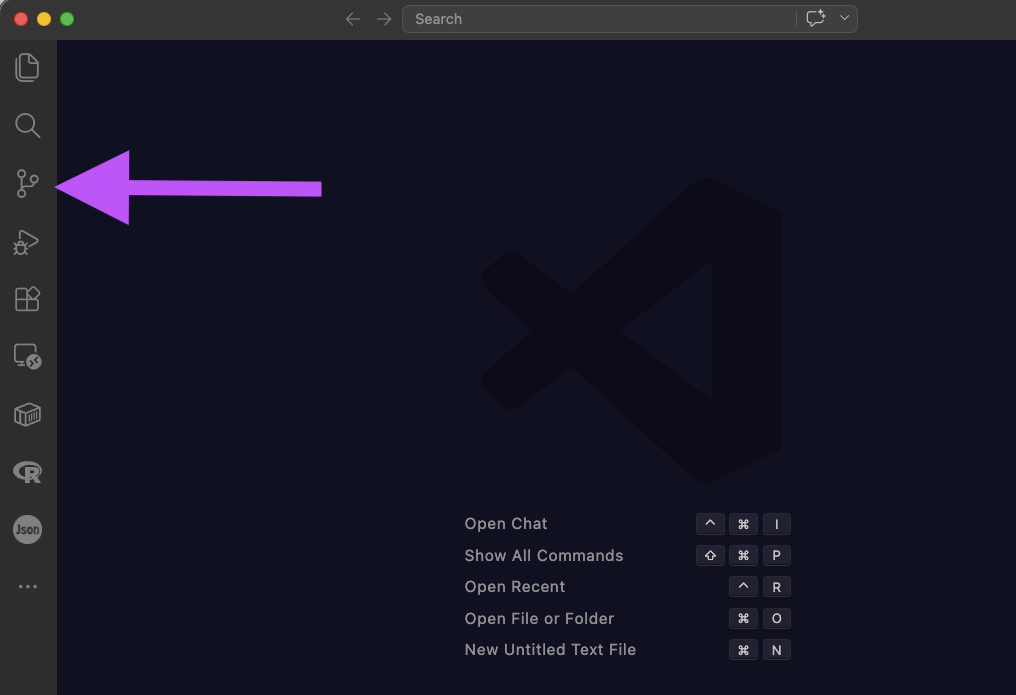
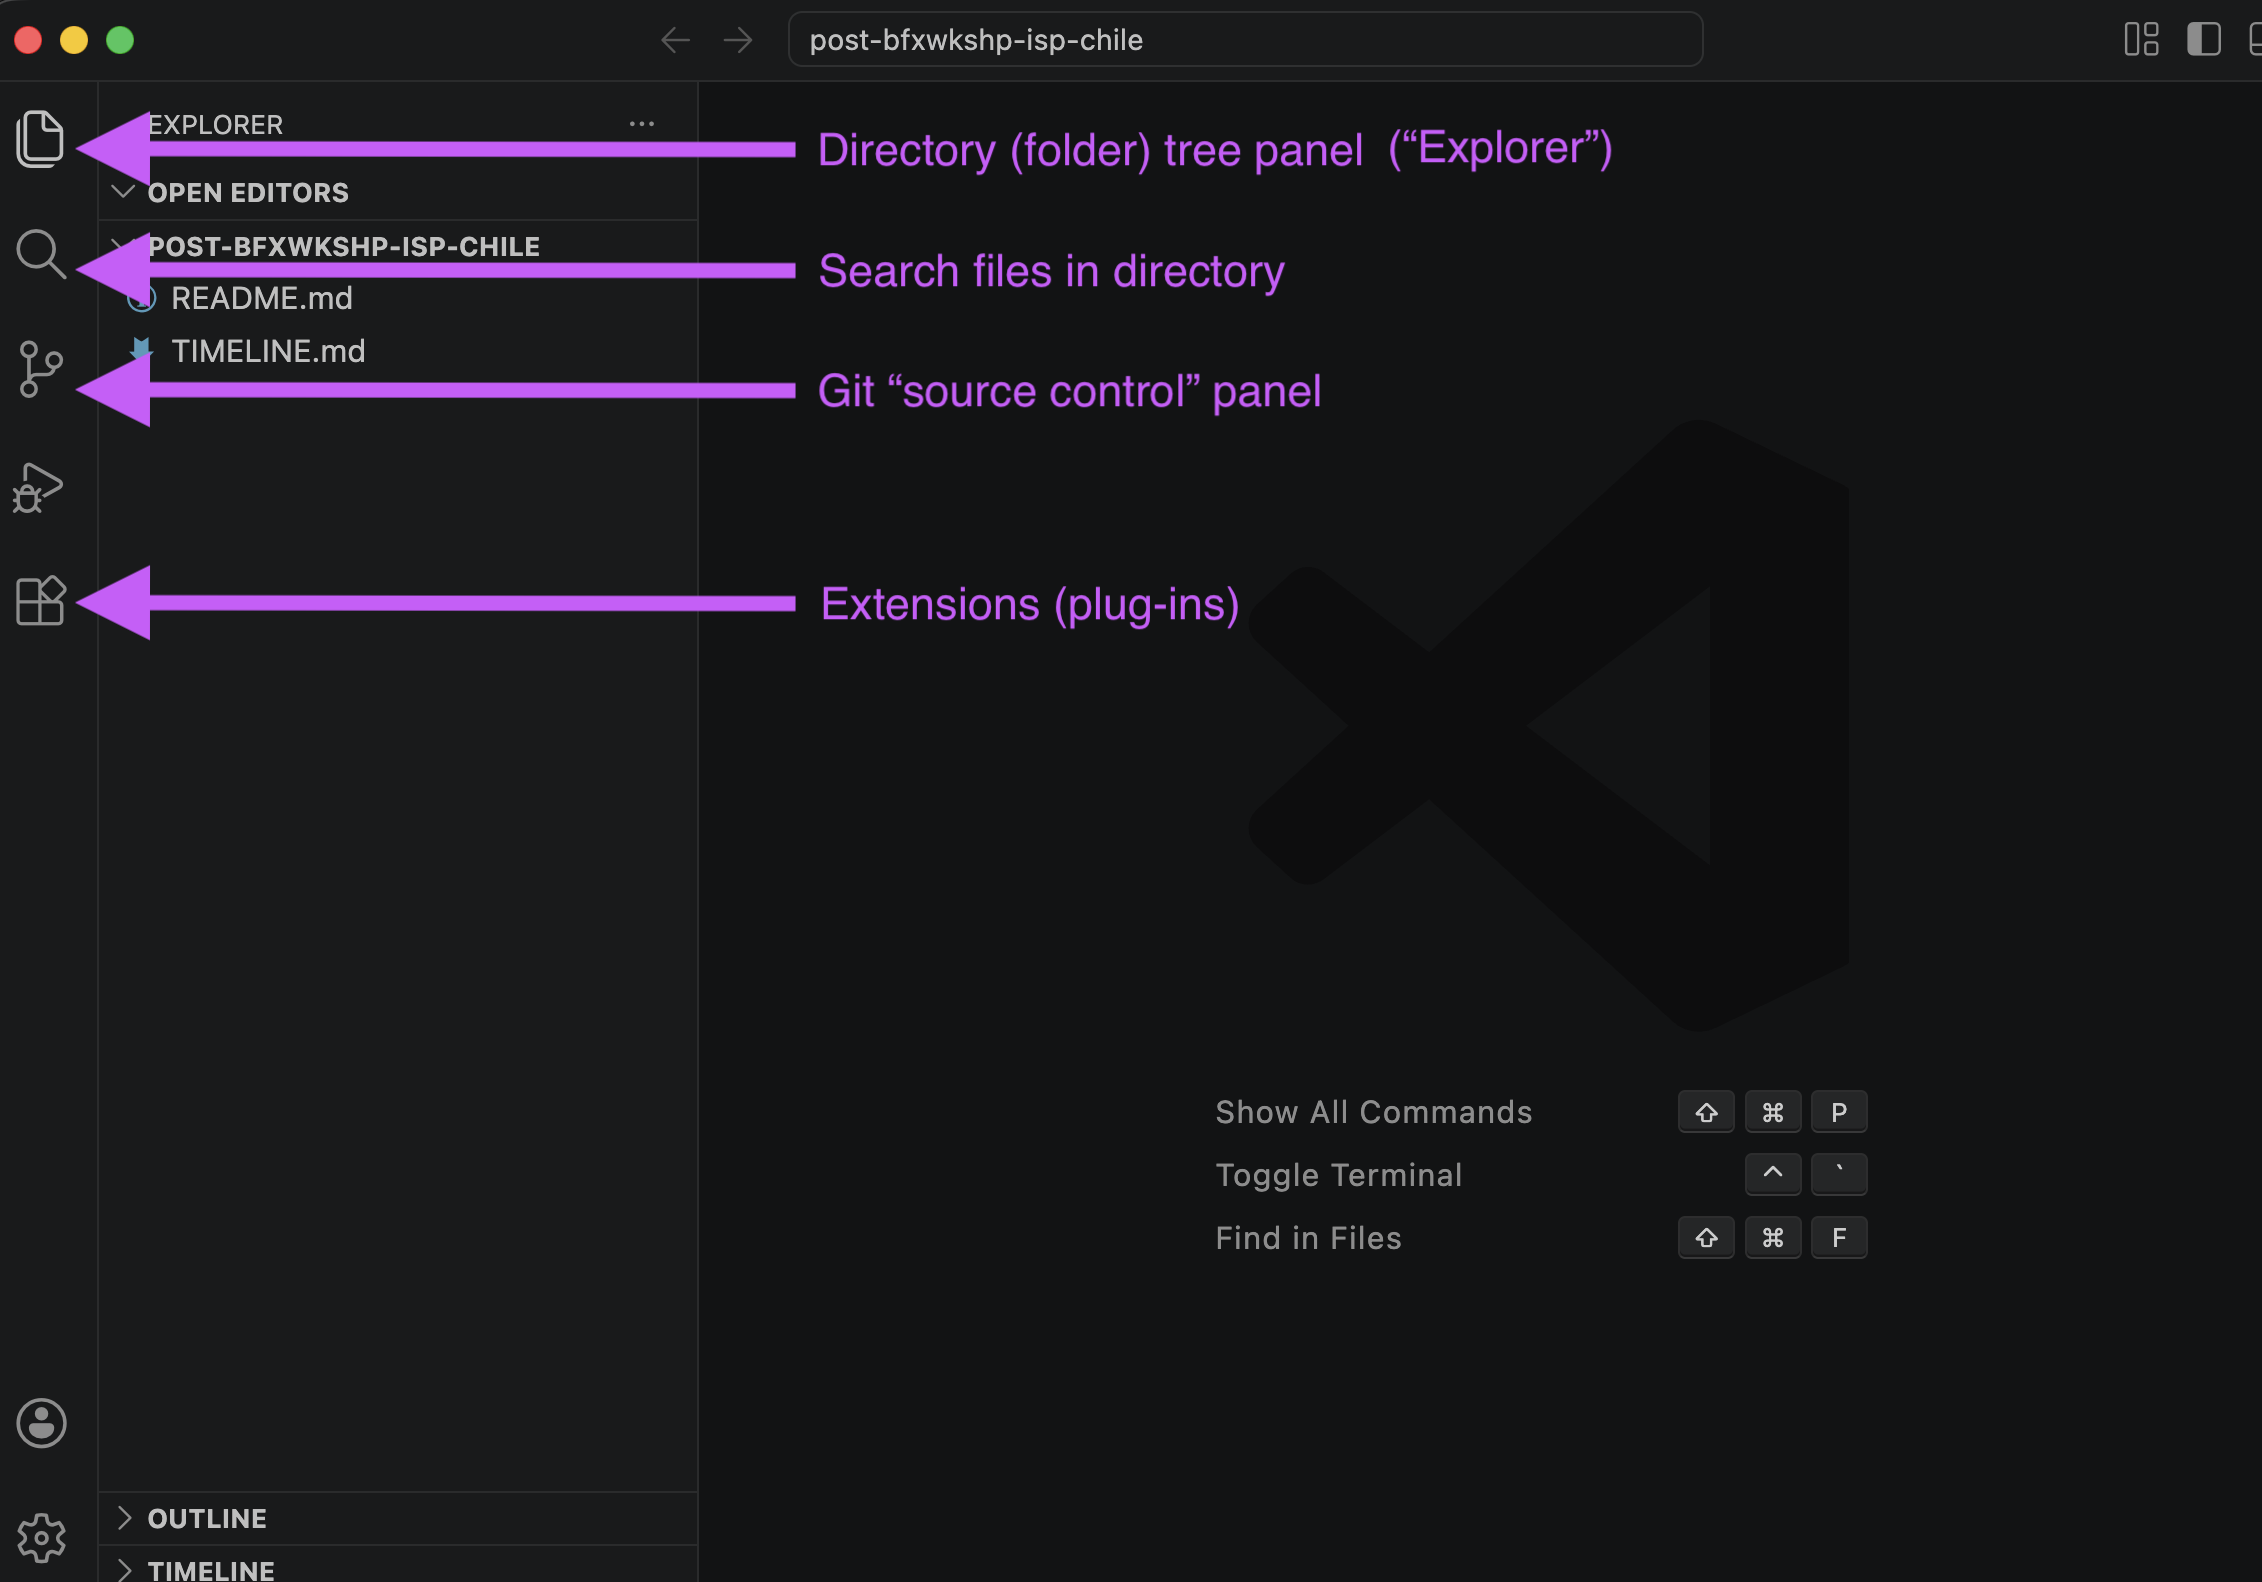
Click the Source Control tab in the left sidebar (the icon that looks like a branching graph).
-
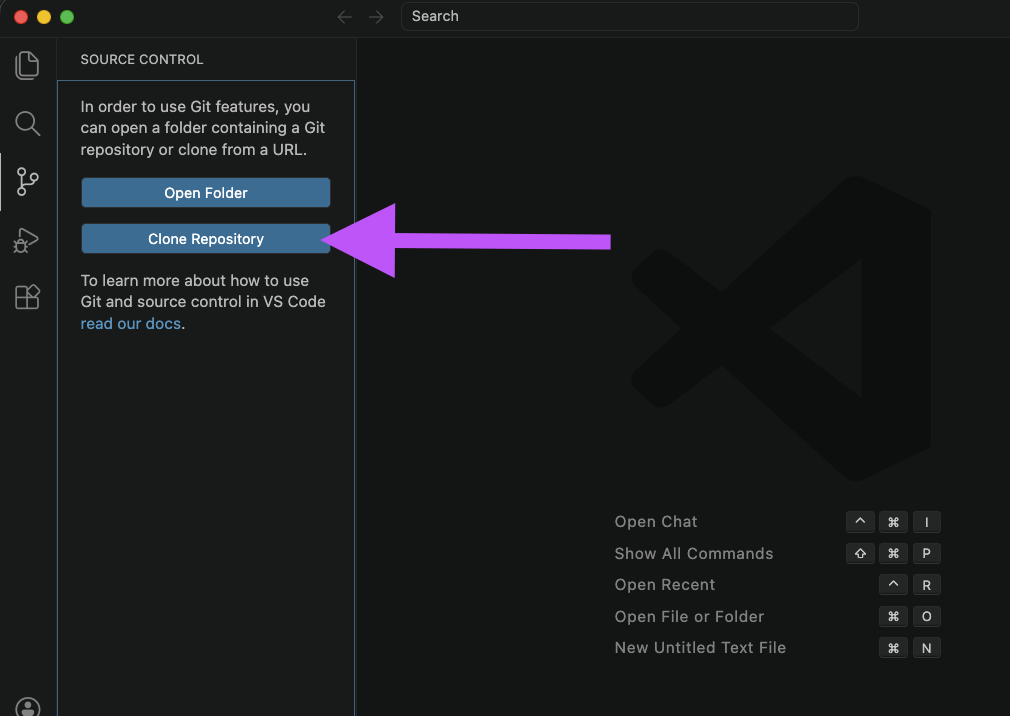
If no folder is open, you will see a Clone Repository button. Click it.
-
Paste your institute’s repository URL (e.g.,
https://github.com/cdcent/your-repo.git) into the input box that appears at the top of the window.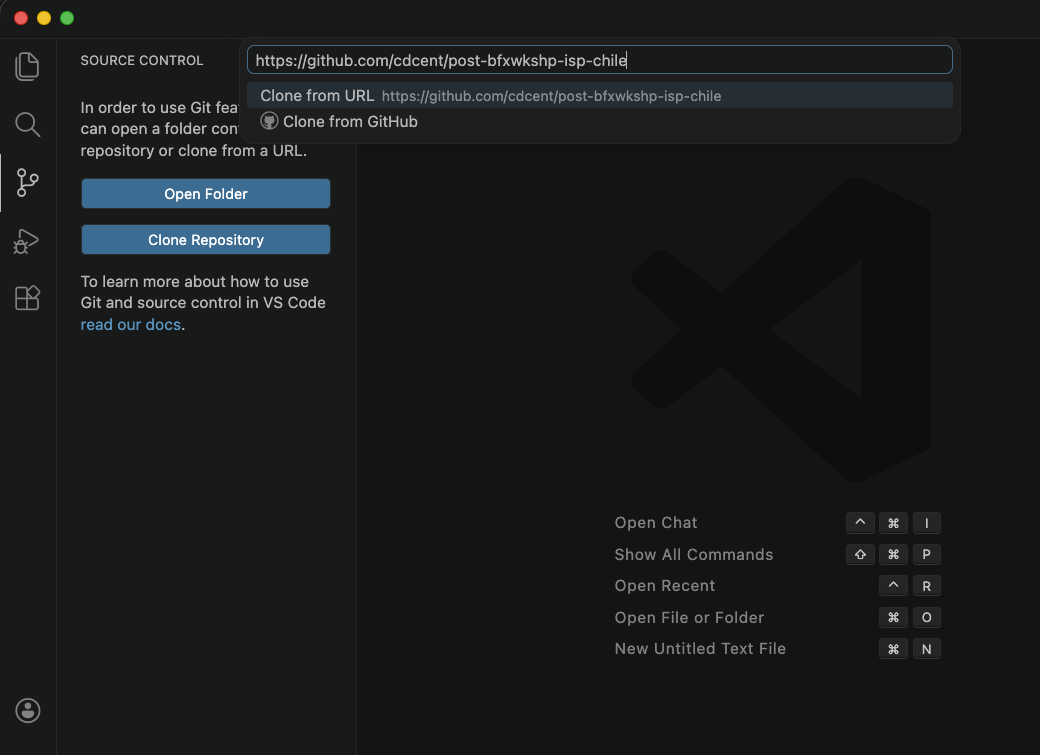
-
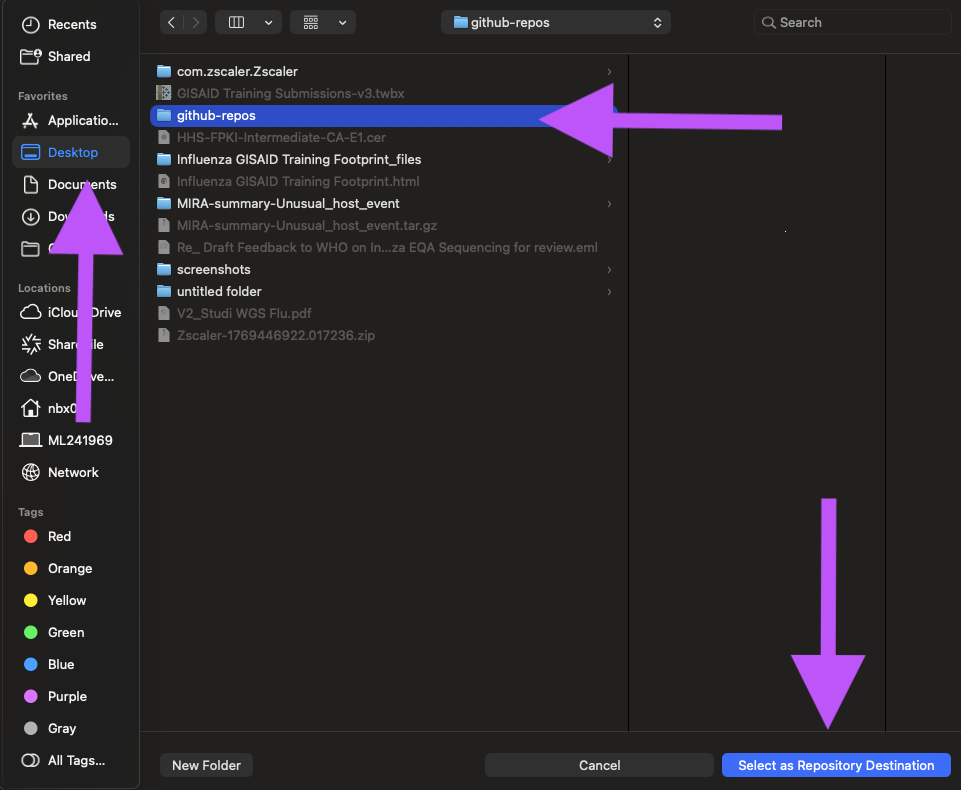
Choose a local folder to clone into and click Select as Repository Destination. Below, I have created a folder on my Desktop called github-repos to store all my cloned repositories.
-
When prompted, click Open to open the cloned repository in VS Code. It will ask you if you trust the publisher of the repository — click Yes, I trust the authors.
2. Create a Branch
-
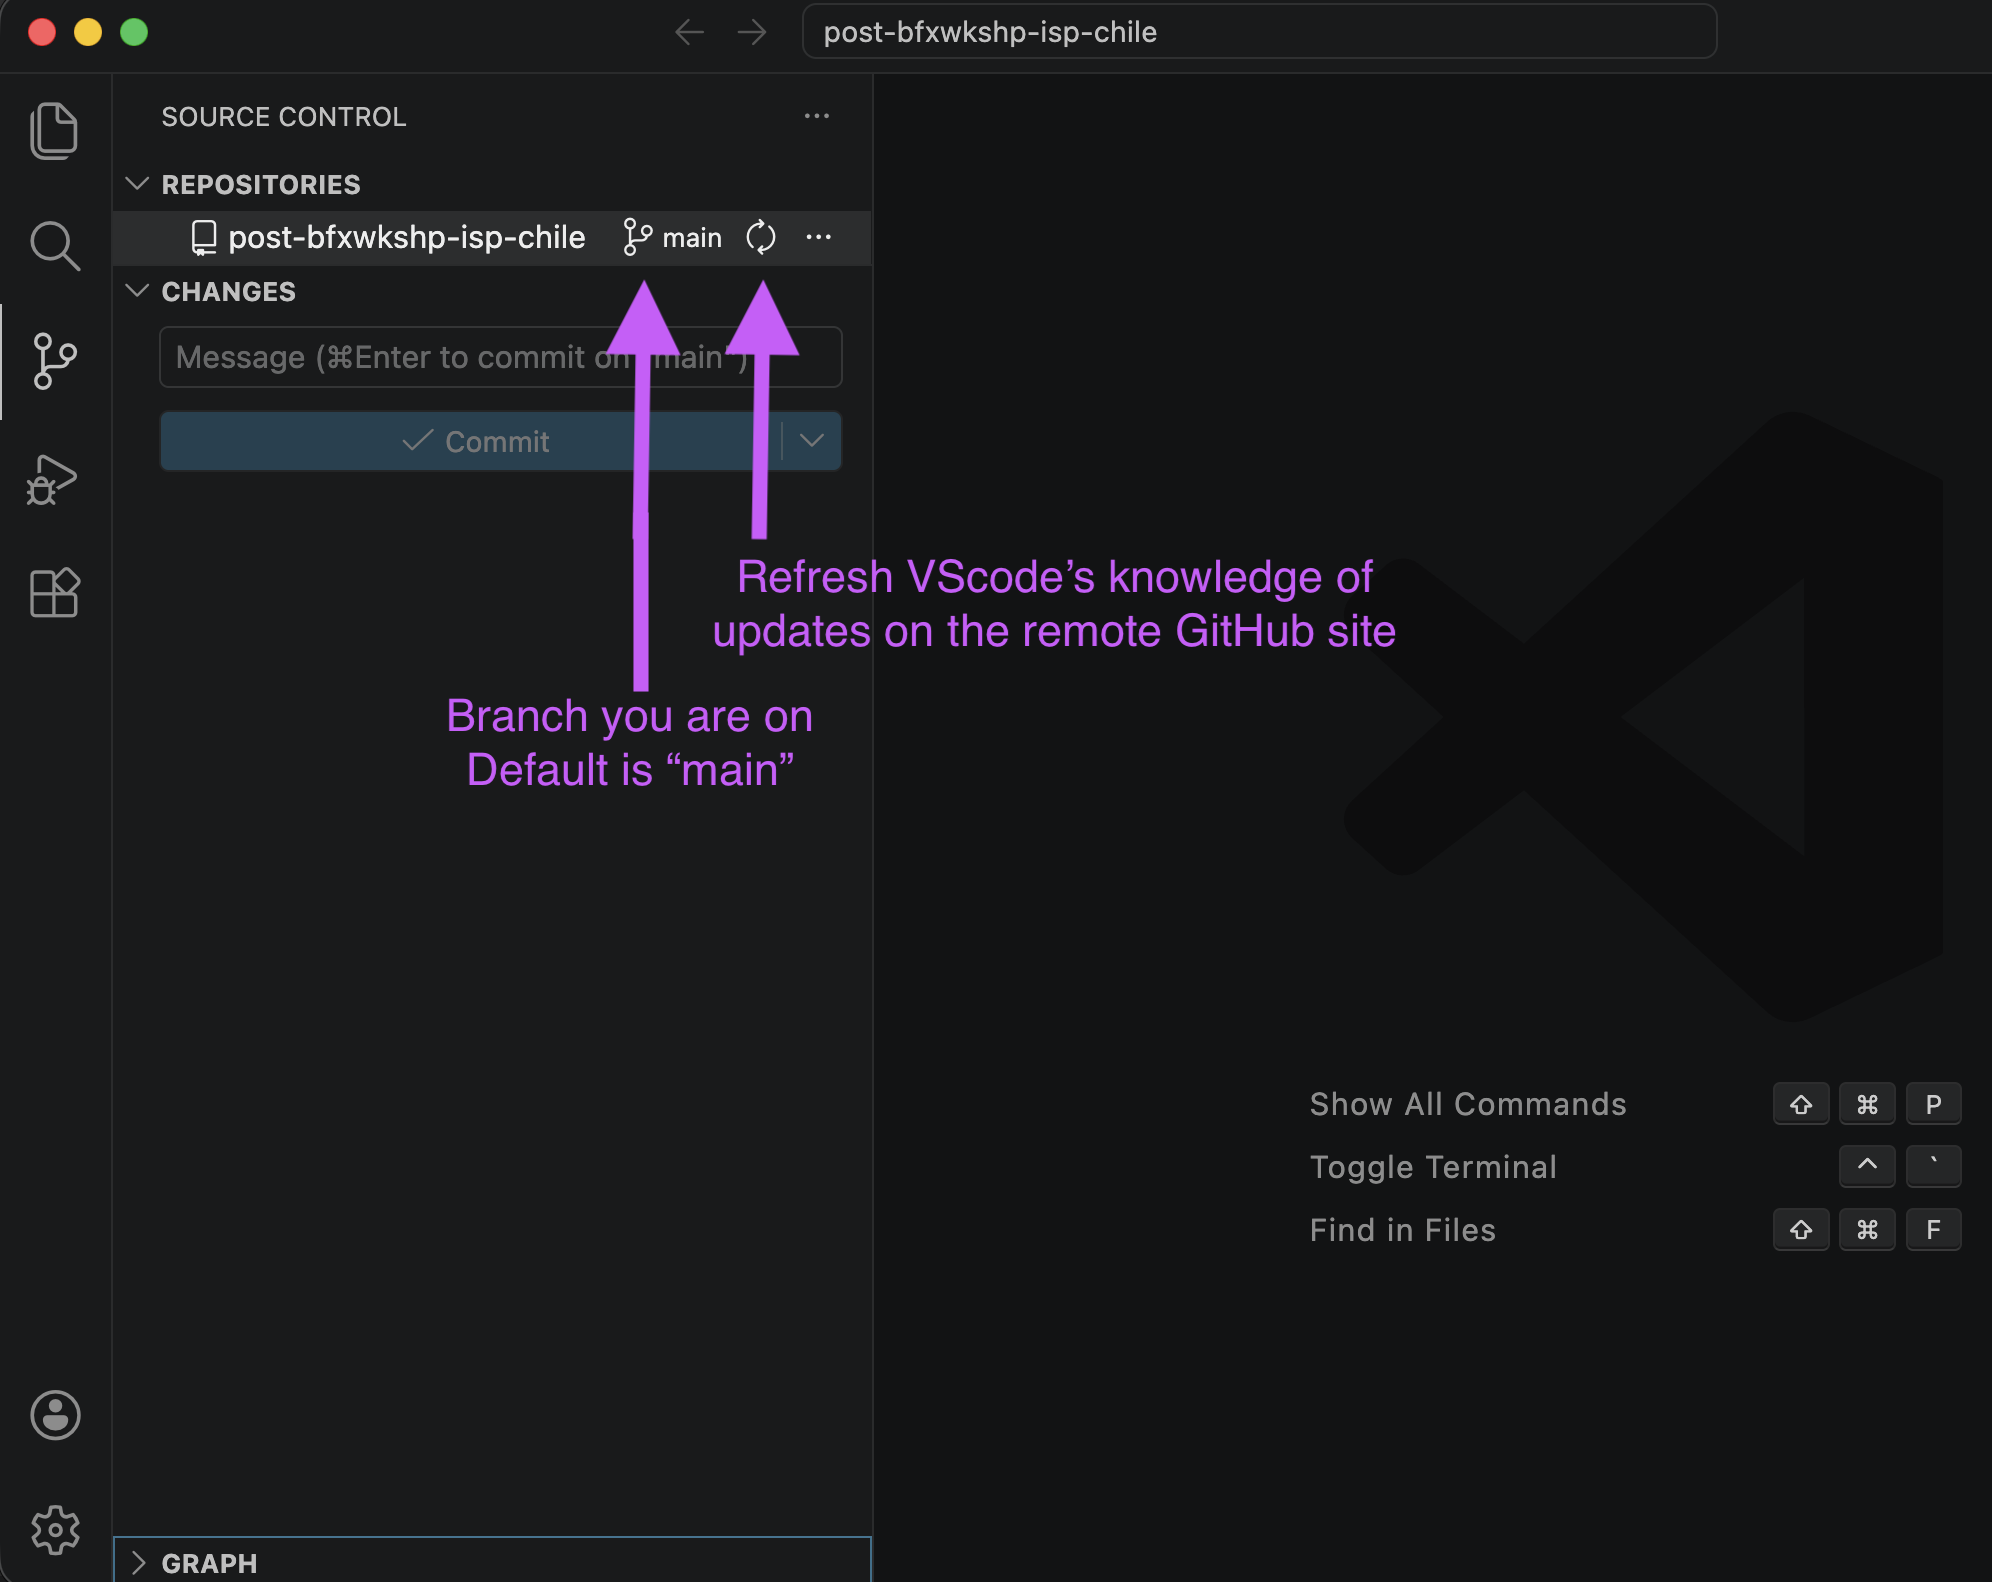
In the Source Control tab, click the “branch” icon beside “main” at the top of the REPOSITORIES panel.
-
Your cursor will move to the input box at the top of the window. Type in a name for your new branch, hit
Enter.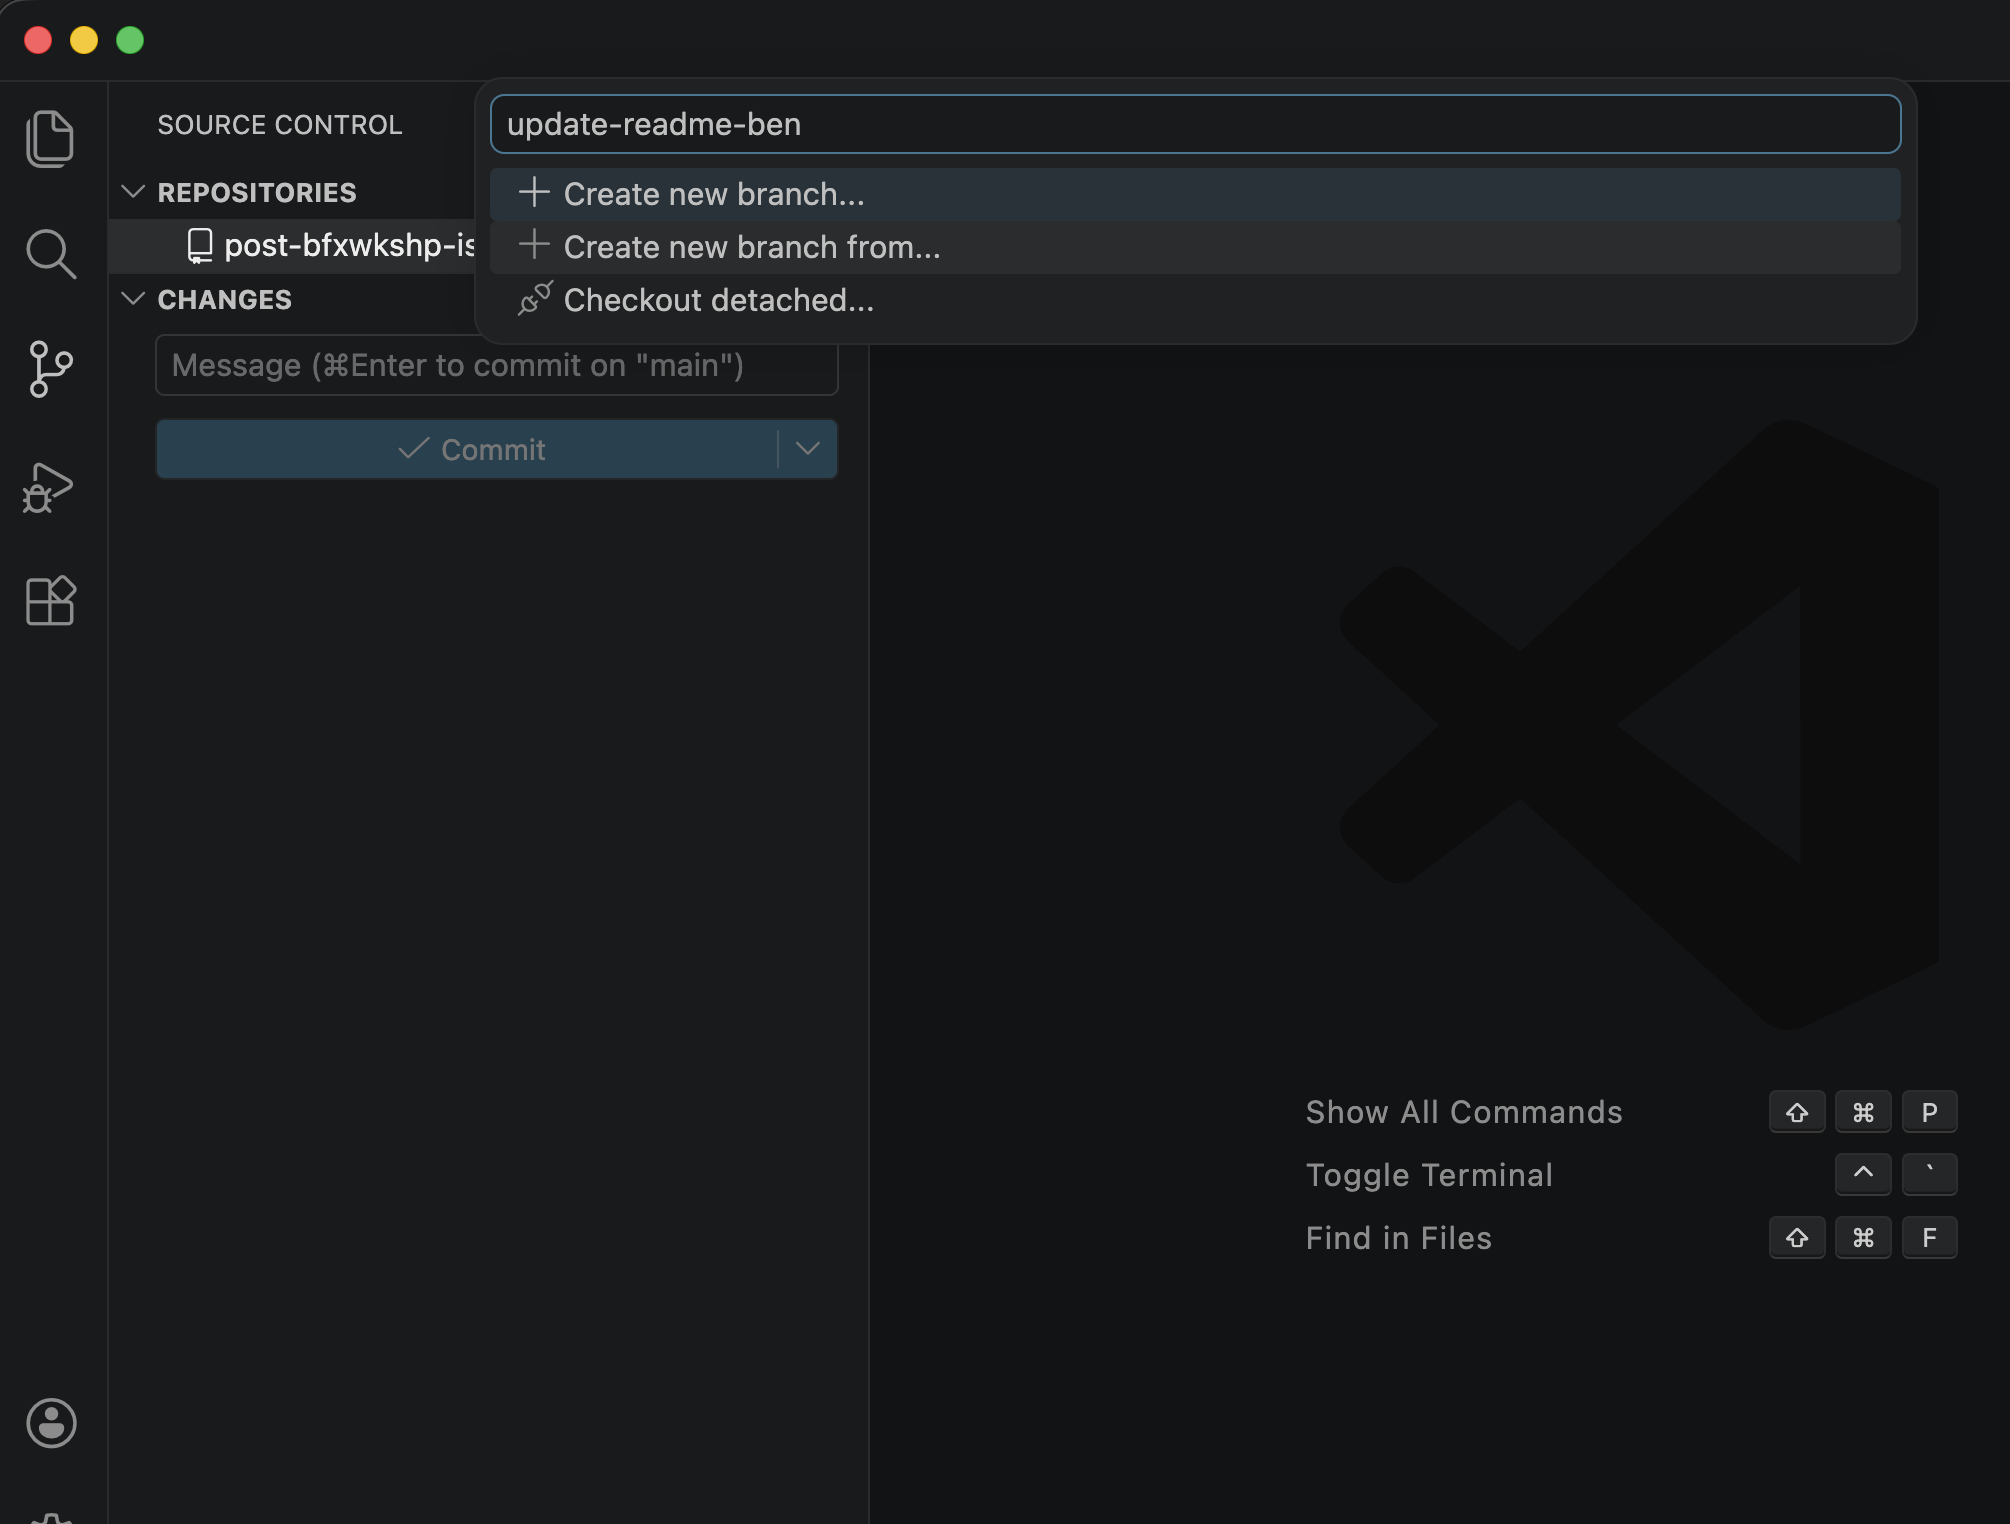
-
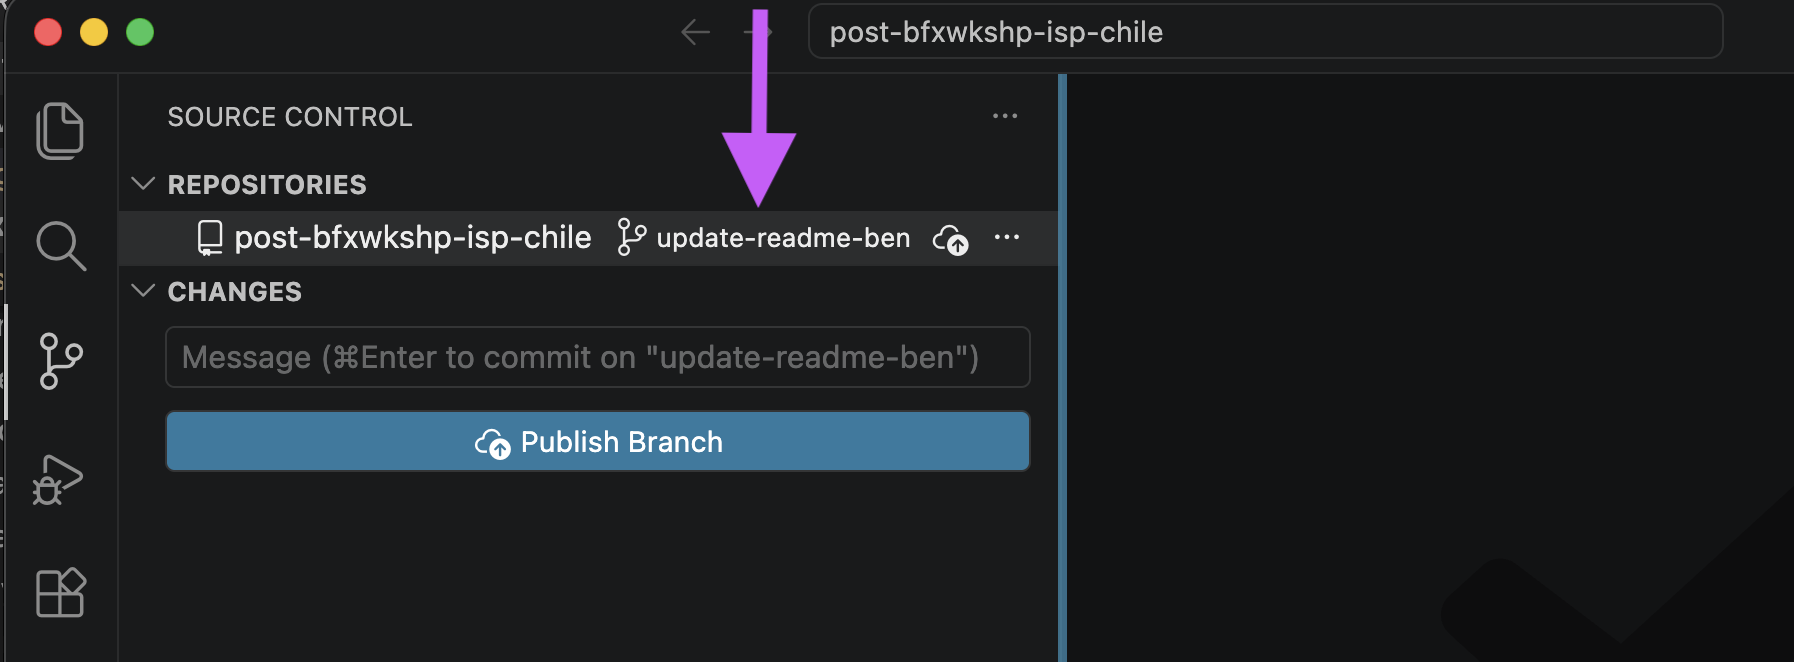
VS Code will create the branch and switch to it automatically. “Publish” the branch to GitHub by clicking the Publish Branch button that appears in the status bar at the bottom of the window.
3. Edit the README
- Click the Explorer tab in the left sidebar to view your files.
- Click the
README.mdfile to open it. -
Make a change in the file, for example:
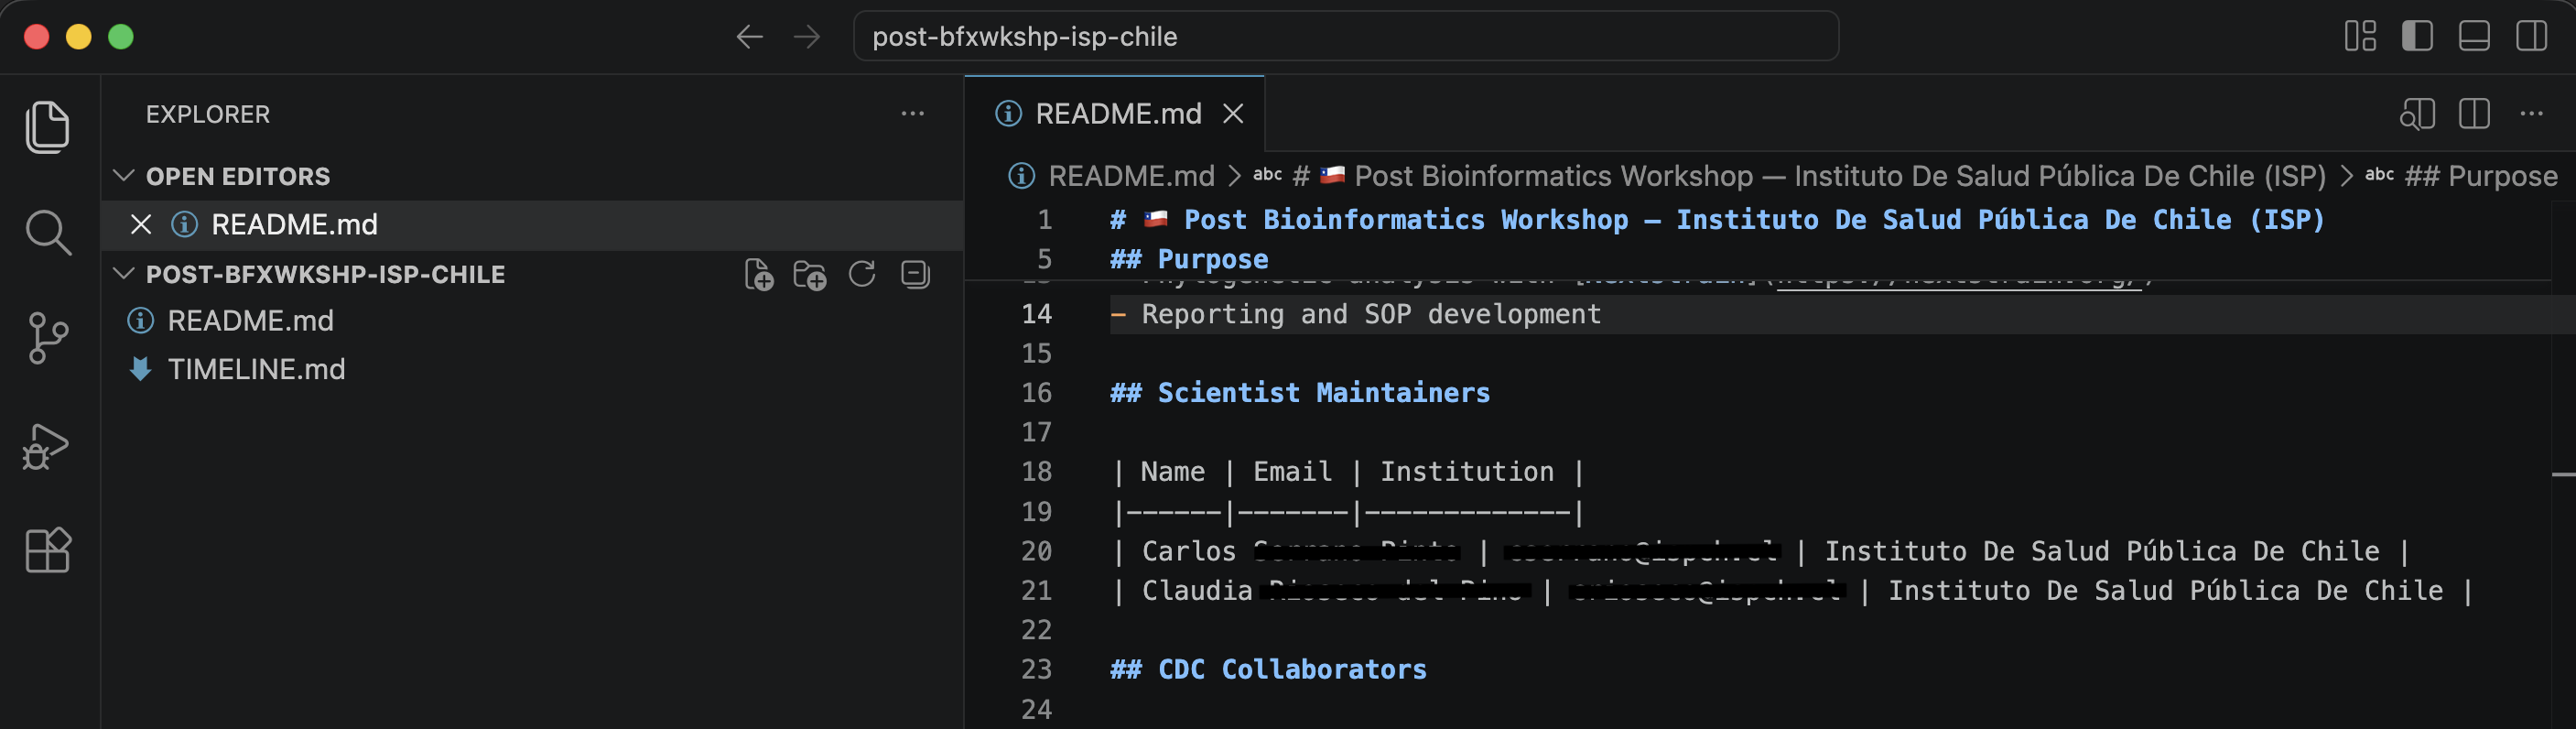
Line 16: “Scientist Maintainers” to “Chilean Scientists” Line 23: “CDC Collaborators” to “CDC Scientists” 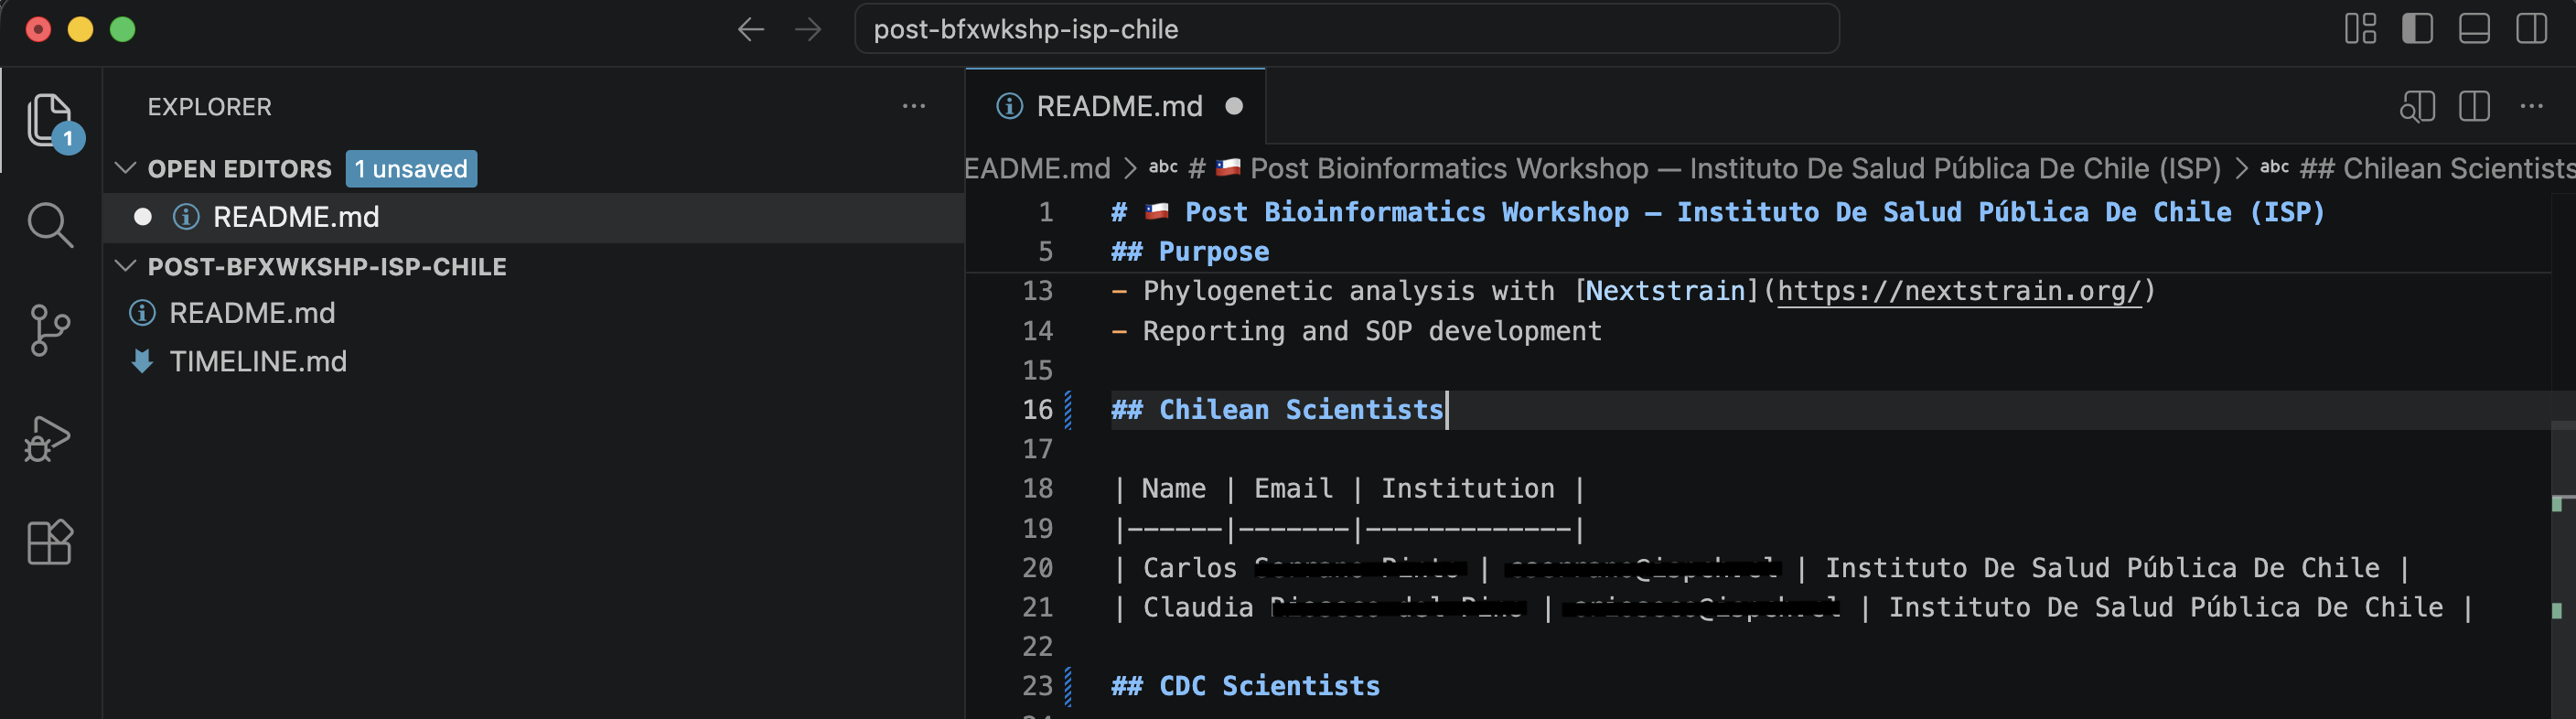
- Save the file (
Ctrl+S/Cmd+S).
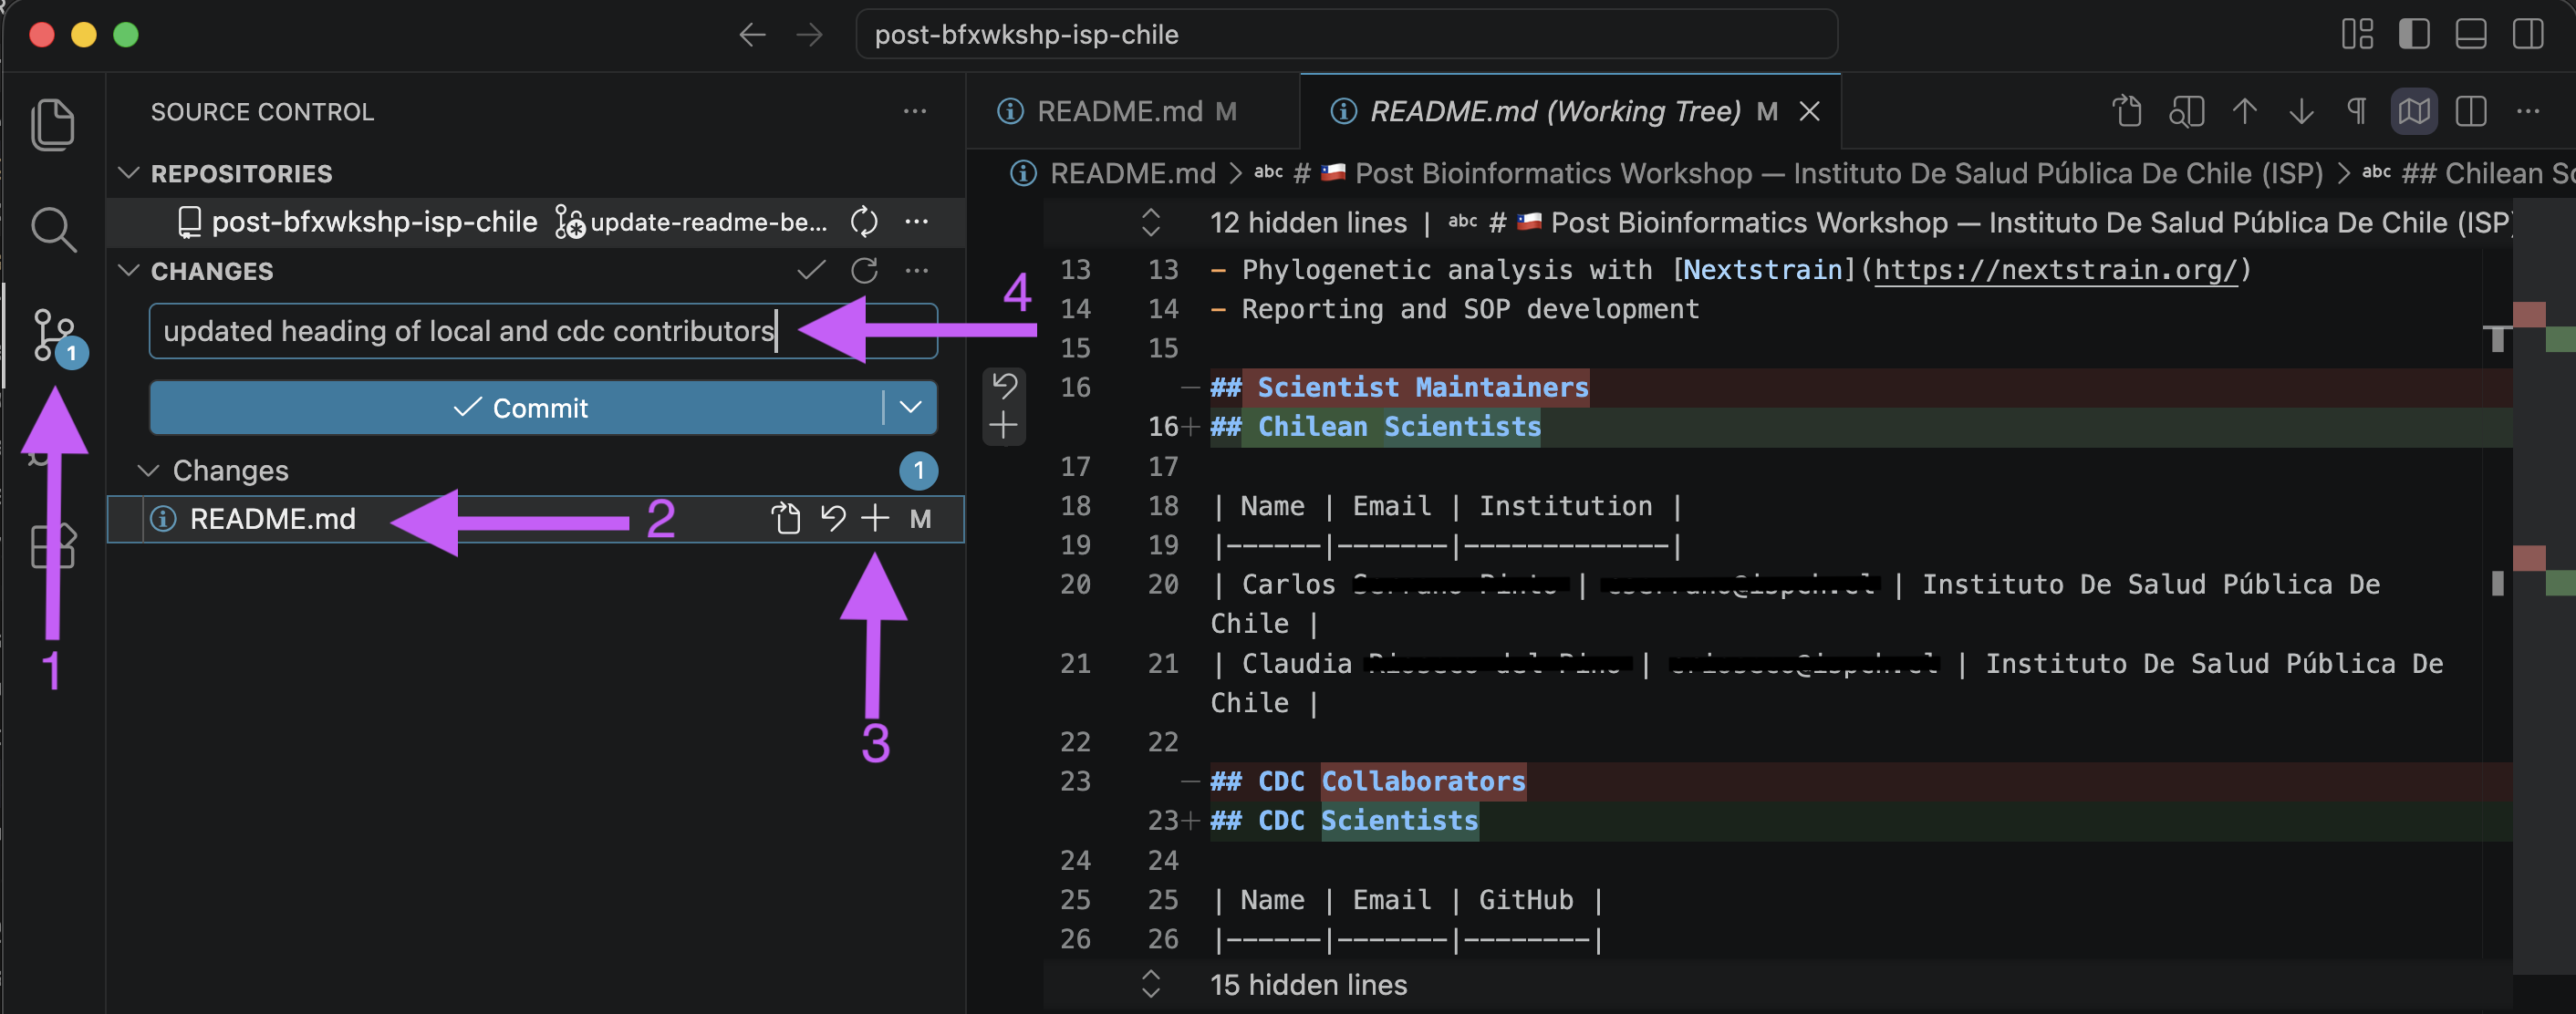
4. Stage, Commit, and Push Changes
- Click the Source Control tab in the left sidebar.
- You should see
README.mdlisted under the Changes section. Clicking on this file will display a “diff” view showing your changes. Red highlights indicate removed text, and green highlights indicate added text. - Hover over
README.mdand click the + (Stage Changes) icon to move it to the Staged Changes section. - Type a commit message in the Message text box at the top of the Source Control panel, e.g.,
updated heading of local and cdc contributors. -
Click the Commit button (checkmark icon) to commit your staged changes.
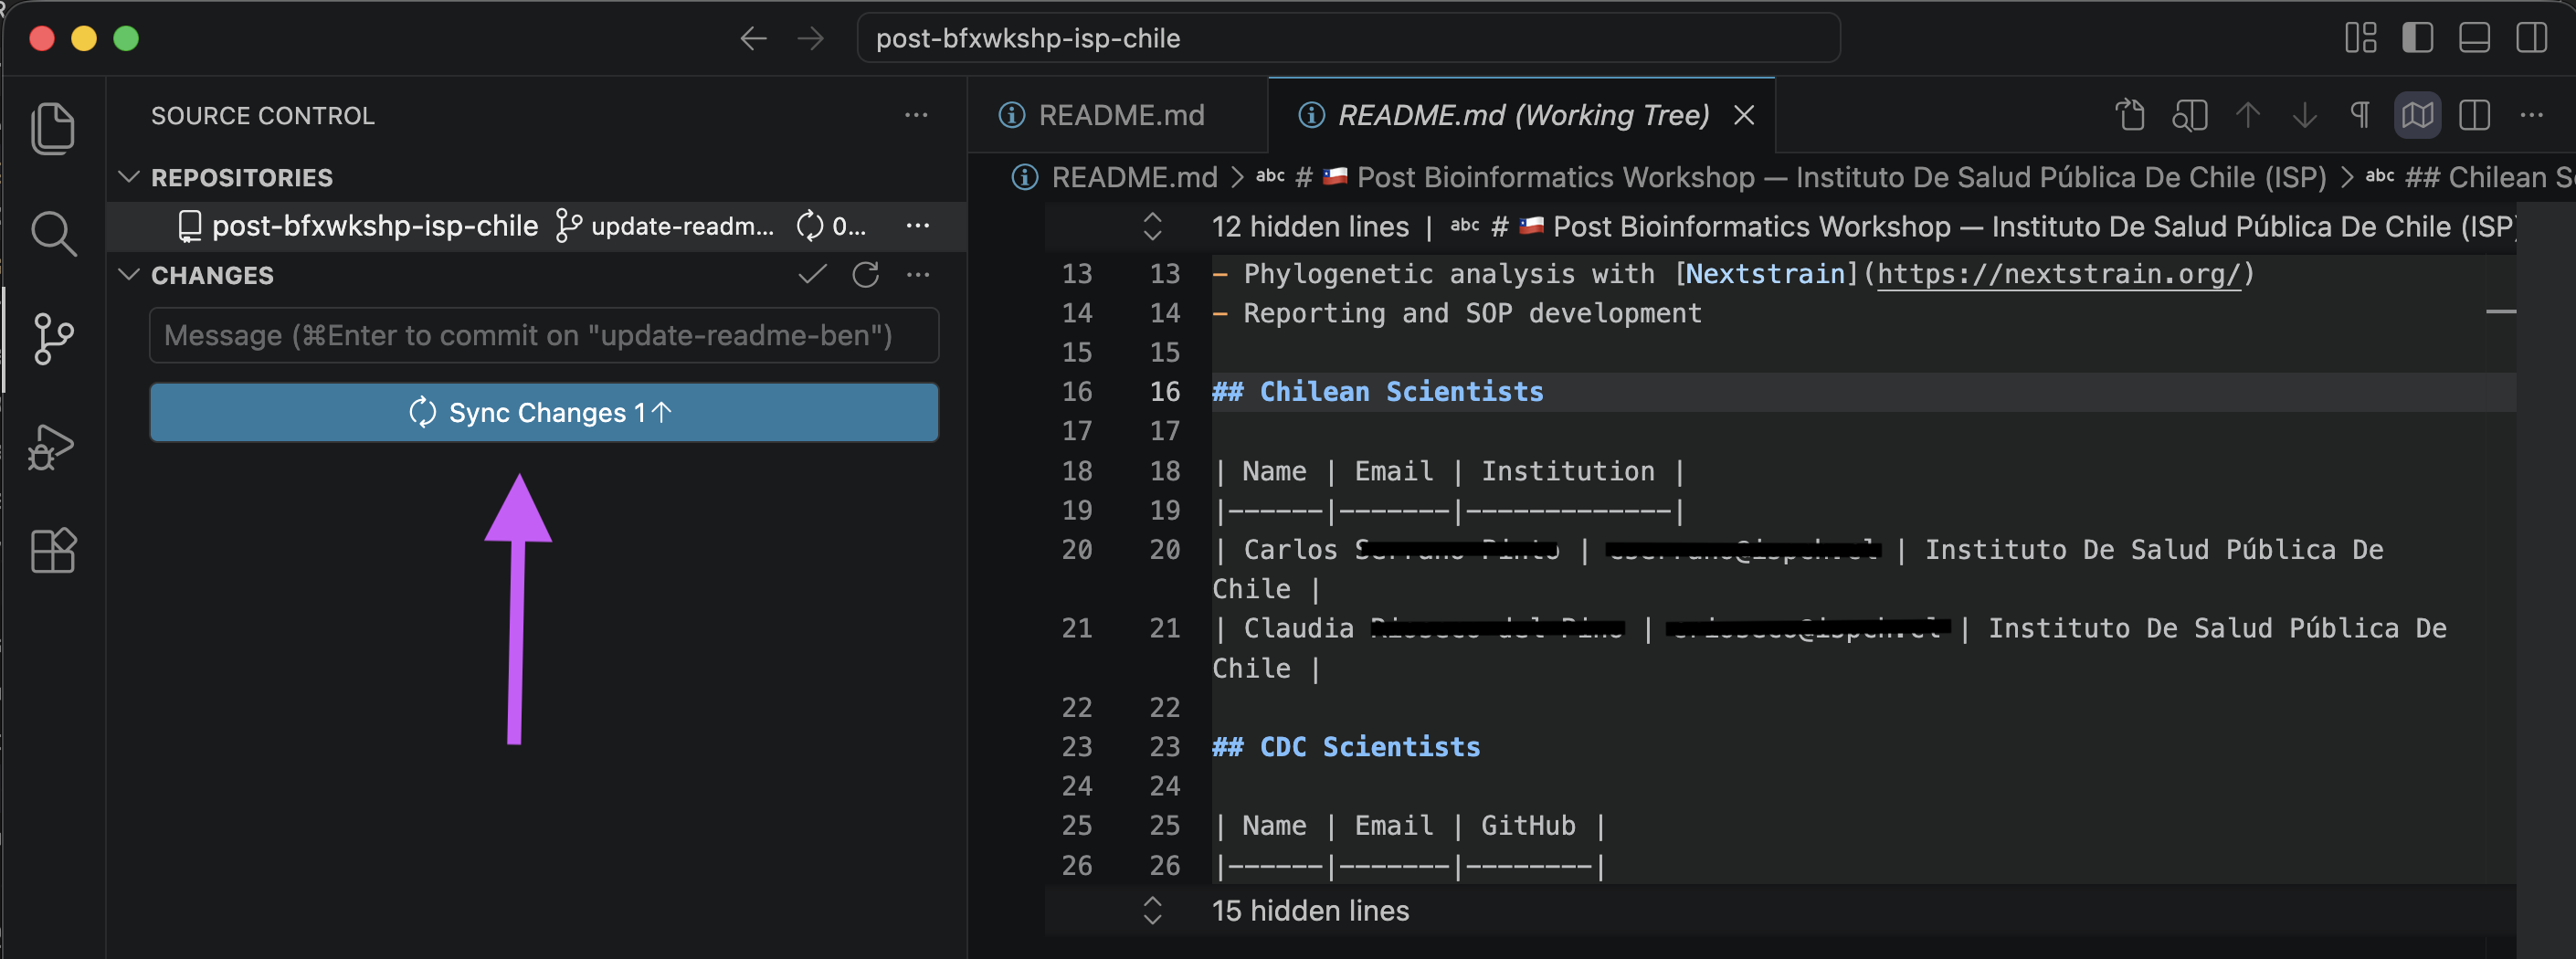
-
The blue button will now say Sync Changes. Click it to push your commit to GitHub. You may be prompted to sign in to GitHub if you haven’t already.
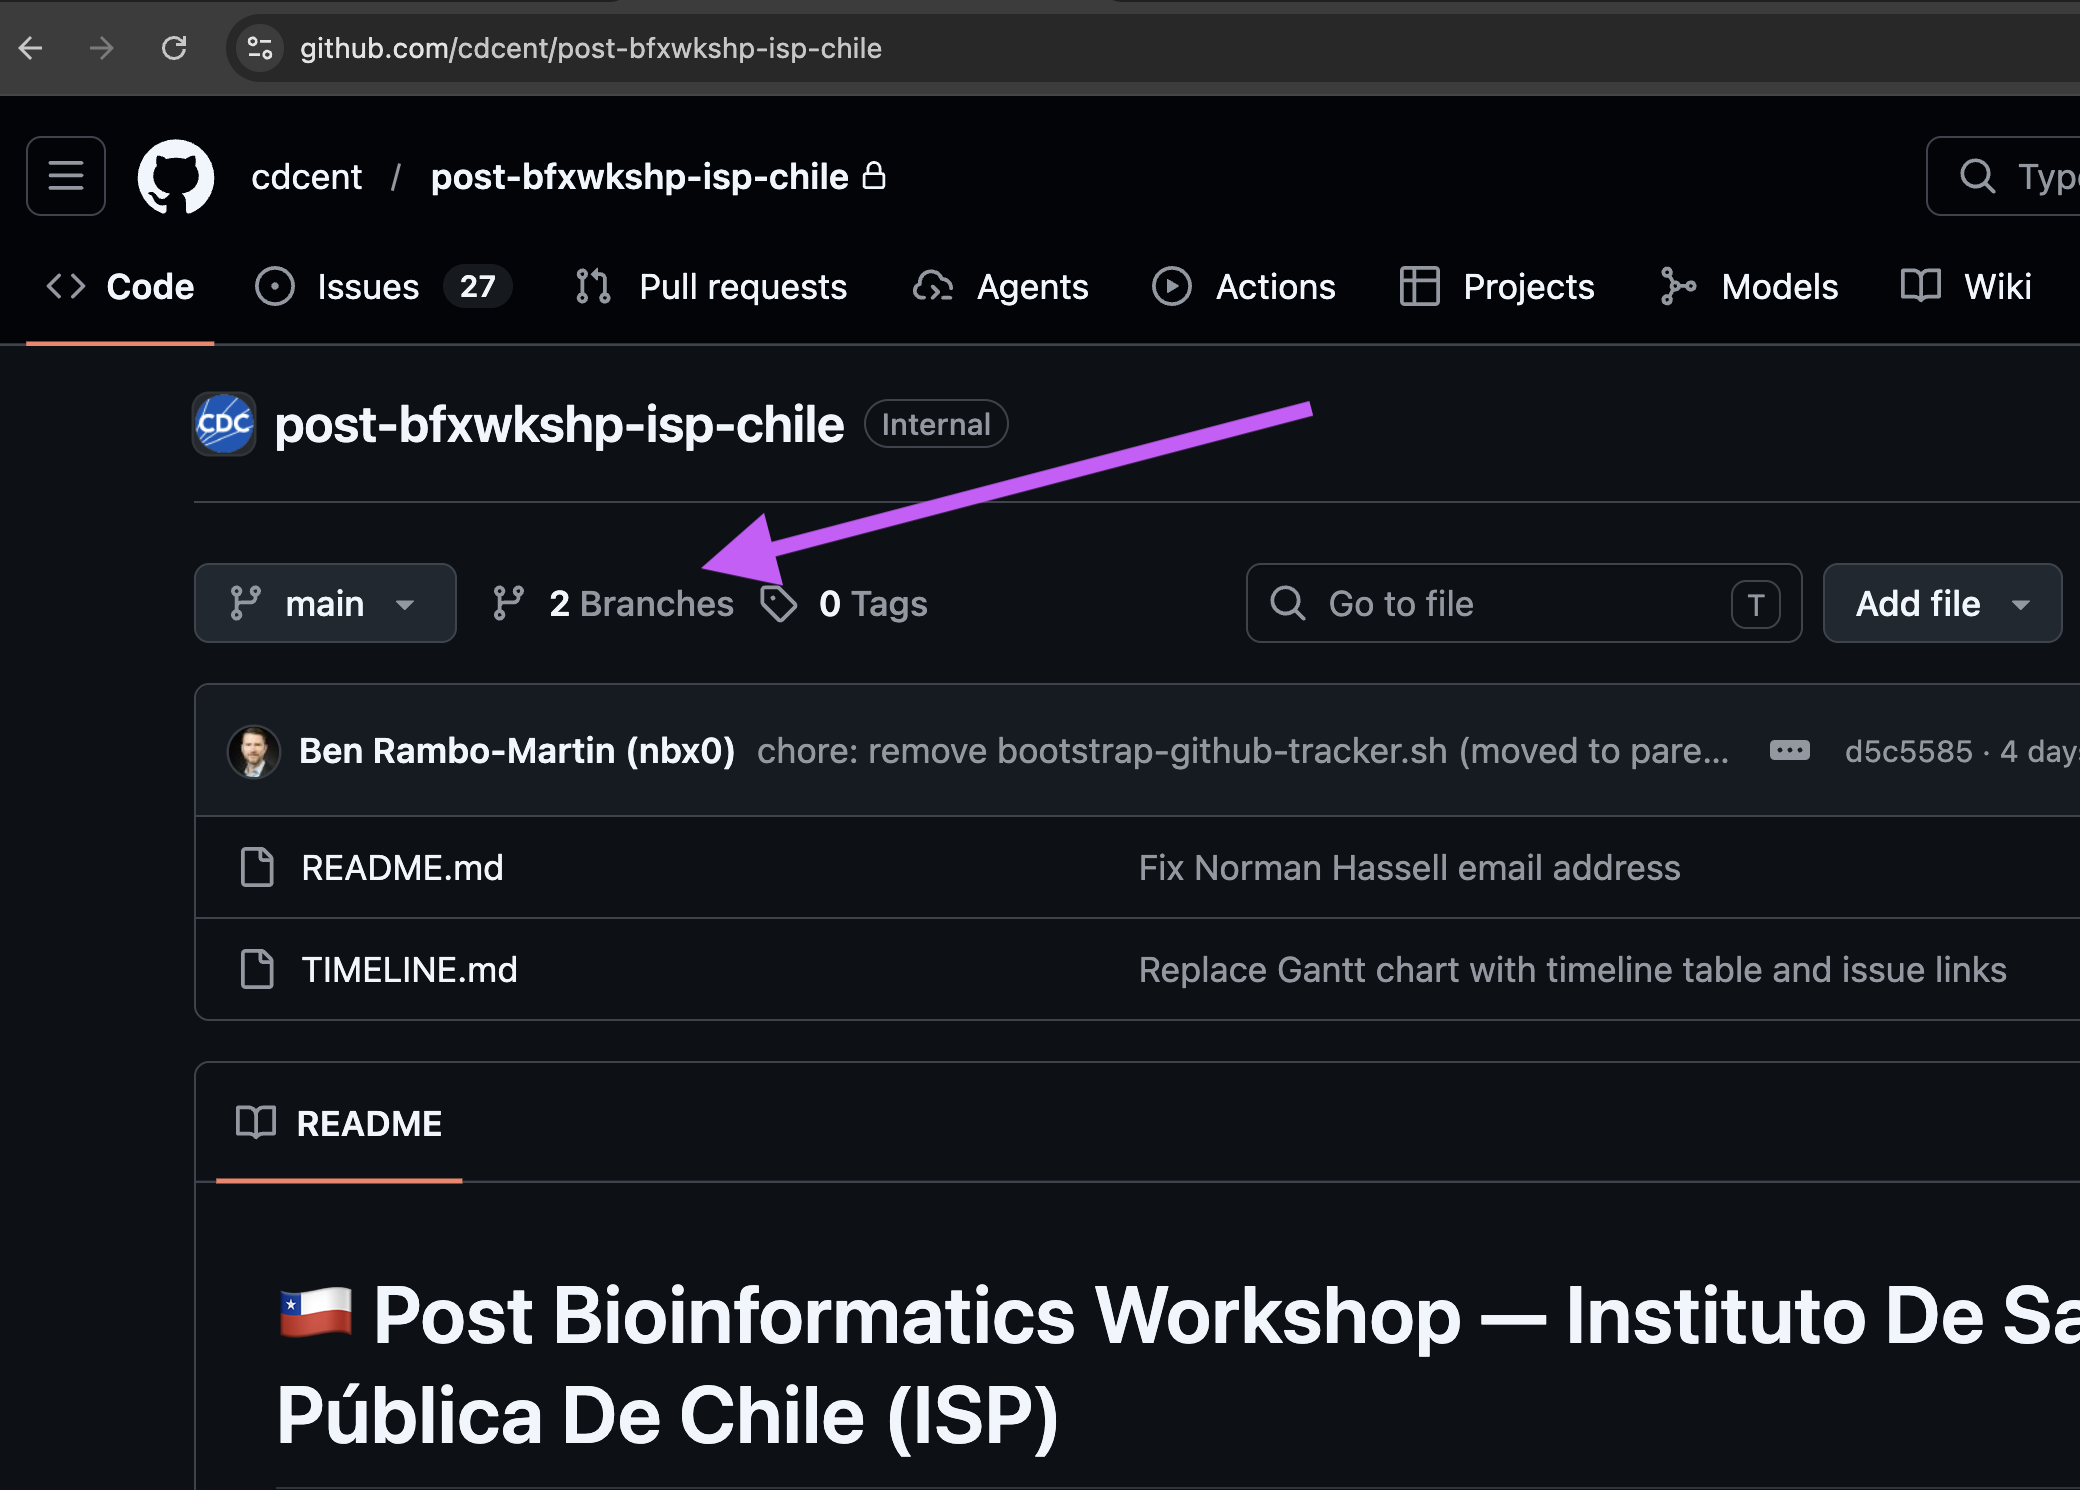
5. Create a Pull Request and Merge (GitHub Website, not VS Code)
- Open your web browser and navigate to your repository on github.com.
-
Click on the Branches tab, then find your branch in the list and click the three dots next to it and click New pull request.

-
Review the changes, add a title and description if needed, then click Create pull request.
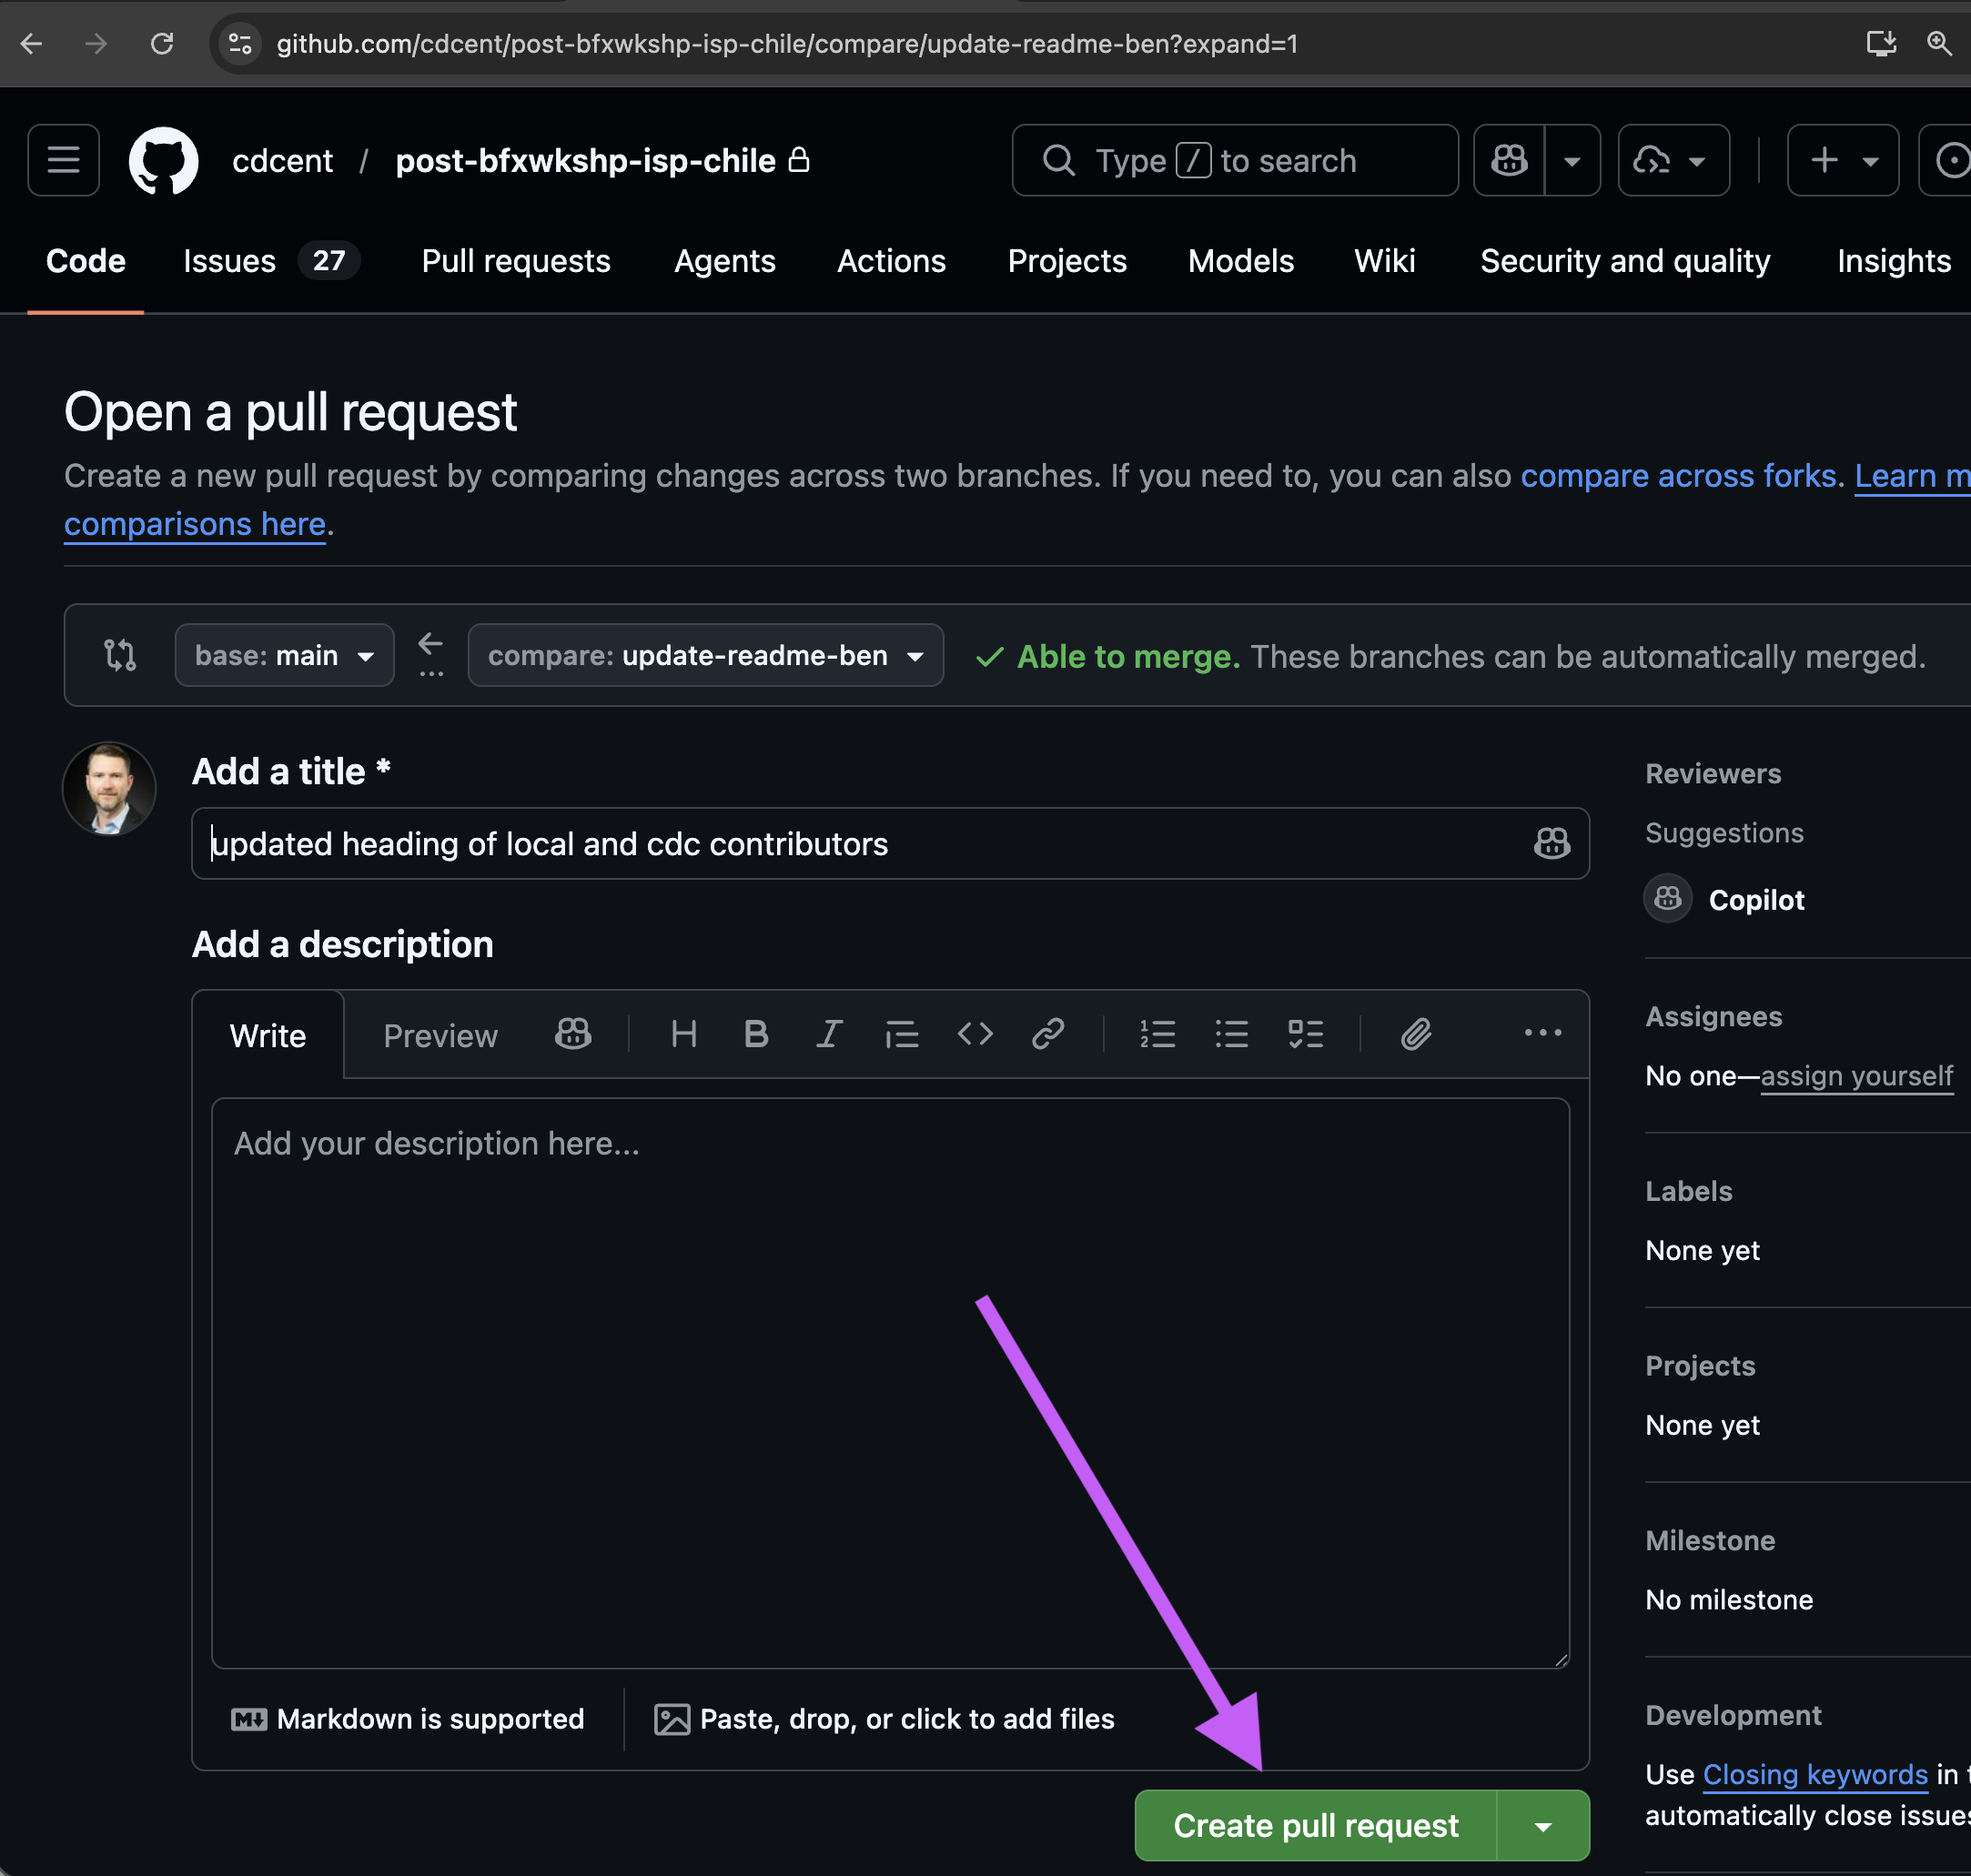
- For these workshop repos, CDC administrators will complete the merge.
7. Pull the Merged Changes Locally
-
Back in VS Code, click the Source Control tab. Click the “branch” icon at the top of the REPOSITORIES panel to switch branches. Select
mainto switch back to the main branch.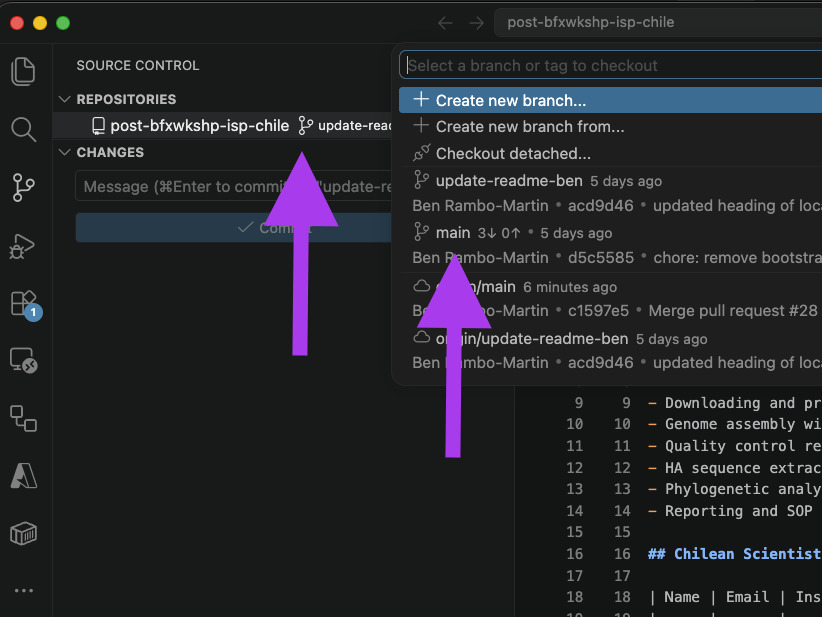
-
Click Sync Changes to pull the latest changes from GitHub, which will include the merged changes from your branch.
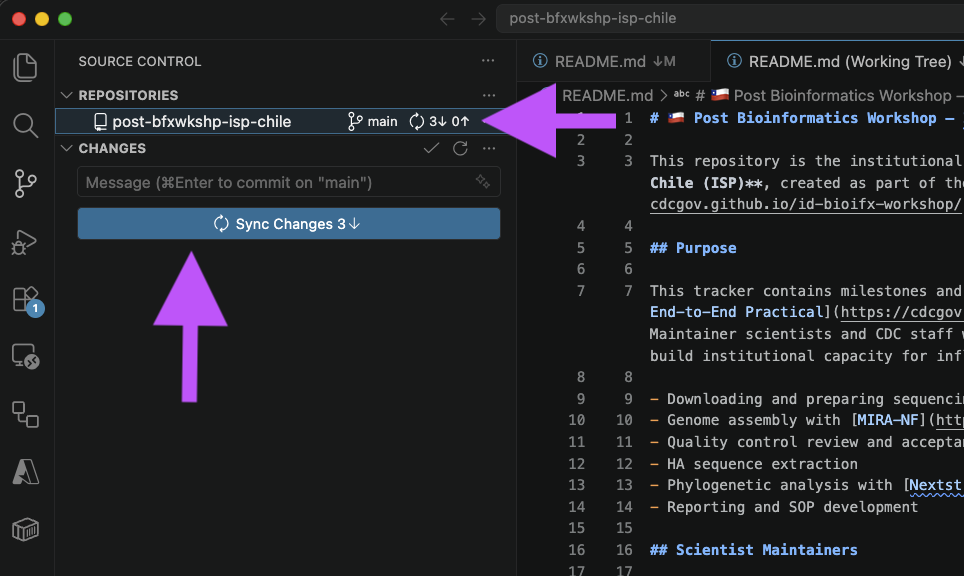
Tip: Click the “sync” icon regularly to keep your local repository up to date with GitHub, especially if others are also making changes.
You have now completed a full Git workflow — clone, branch, edit, commit, push, and merge. This is the foundation for collaborating on code with your team.