Deploy data ingestion service (DI API) for NBS 7
This page walks through deploying the , including database setup and installation.
On this page
Before you begin
The DI API utilizes three databases: NBS_Msgoute, NBS_ODSE and NBS_DataIngest. NBS_DataIngest is a new database essential for ingesting, validating Electronic Lab Reports (), converting them into XML payloads, and integrating the XML into the NBS_MSGOUT database. It must be created before deploying the app on the cluster.
Create the NBS_DataIngest database
Run the following SQL scripts before deploying the data ingestion service.
-
Create the database:
IF NOT EXISTS(SELECT * FROM sys.databases WHERE name = 'NBS_DataIngest') BEGIN CREATE DATABASE NBS_DataIngest END GO USE NBS_DataIngest GO -
Grant permissions for the
nbs_odsuser:USE [NBS_DataIngest] GO CREATE USER [nbs_ods] FOR LOGIN [nbs_ods] GO USE [NBS_DataIngest] GO ALTER USER [nbs_ods] WITH DEFAULT_SCHEMA=[dbo] GO USE [NBS_DataIngest] GO ALTER ROLE [db_owner] ADD MEMBER [nbs_ods] GO
Liquibase
- The data ingestion service includes a built-in Liquibase integration that automatically applies database schema changes on deployment.
- DB changes detail can be reviewed here: NEDSS-DataIngestion/data-ingestion-service/src/main/resources/db at v7.13.0 · CDCgov/NEDSS-DataIngestion
- See Deploy the data ingestion service using Helm for deployment steps.
Liquibase DB change verification
- To verify whether the database changes were applied, first ensure the DI container is stable and running; since the container manages Liquibase, it won’t start if Liquibase fails.
- If there is failure by Liquibase, the DI pod will be unstable, and specific error can be found within the container log.
Deploy the data ingestion service using Helm
Complete the following steps to deploy the ‘dataingestion-service’ Helm chart from the charts/dataingestion-service/ directory of your cloned NEDSS-Helm repository:
-
In
values.yaml, search forEXAMPLEand fill in your environment-specific values for AWS or Azure as appropriate. The Helm values reference lists the values to use. -
Confirm that entries for the following host were created and point to the Network Load Balancer () in front of your Kubernetes cluster (this must be the ACTIVE NLB provisioned in the base install steps). Make this change in your authoritative DNS service (for example, ). Replace
EXAMPLE_DOMAINwith your domain name invalues.yaml. See the Deploy Traefik ingress controller for reference. data ingestion service application:data.site_name.example_domain.com -
To enable ingress, set
reportingService.enabledto"true":reportingService: enabled: "true" -
Set the connection values.
NBS_DataIngestis the newly created database for the data ingestion service.NBS_MSGOUTEandNBS_ODSEare existing NBS databases. Thedbservervalue is the database server endpoint only; do not include the port number.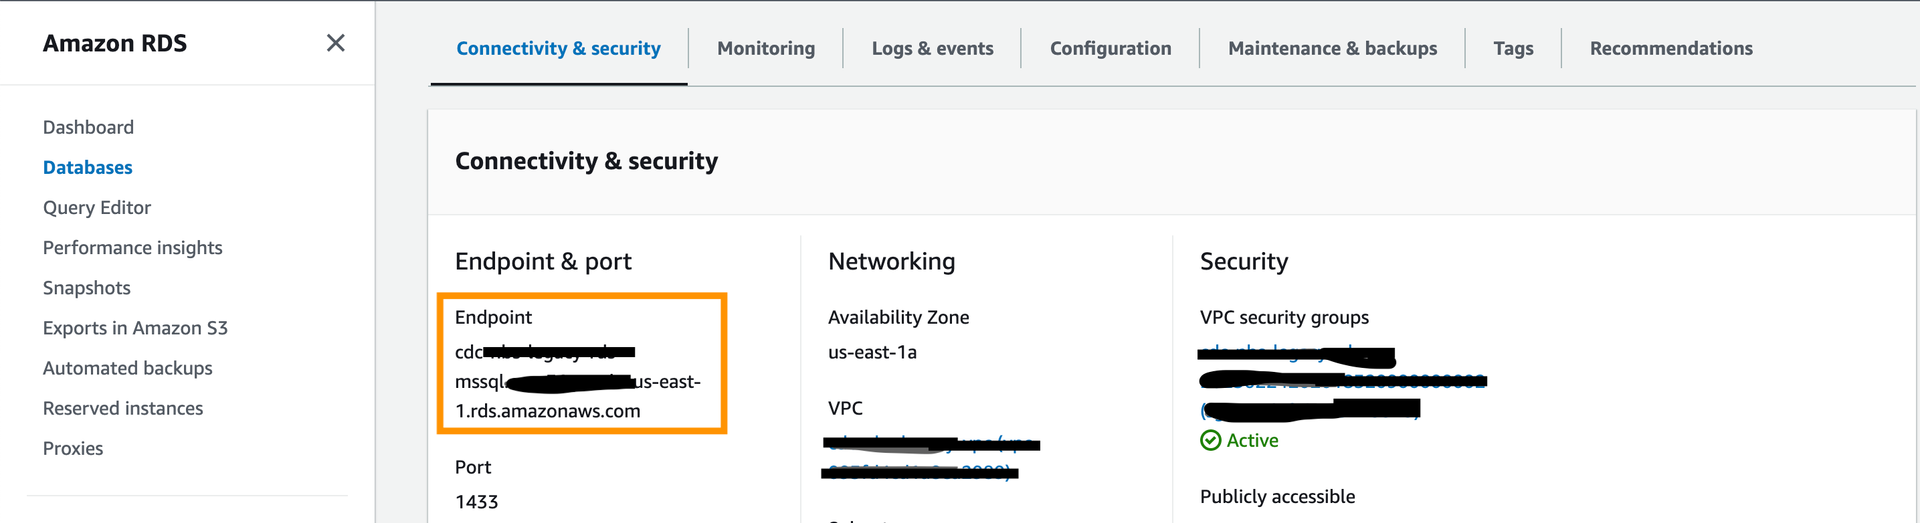
jdbc: dbserver: "EXAMPLE_DB_ENDPOINT" username: "EXAMPLE_ODSE_DB_USER" password: "EXAMPLE_ODSE_DB_USER_PASSWORD" -
Set the broker endpoint. Use either of the two private (plaintext) endpoints:
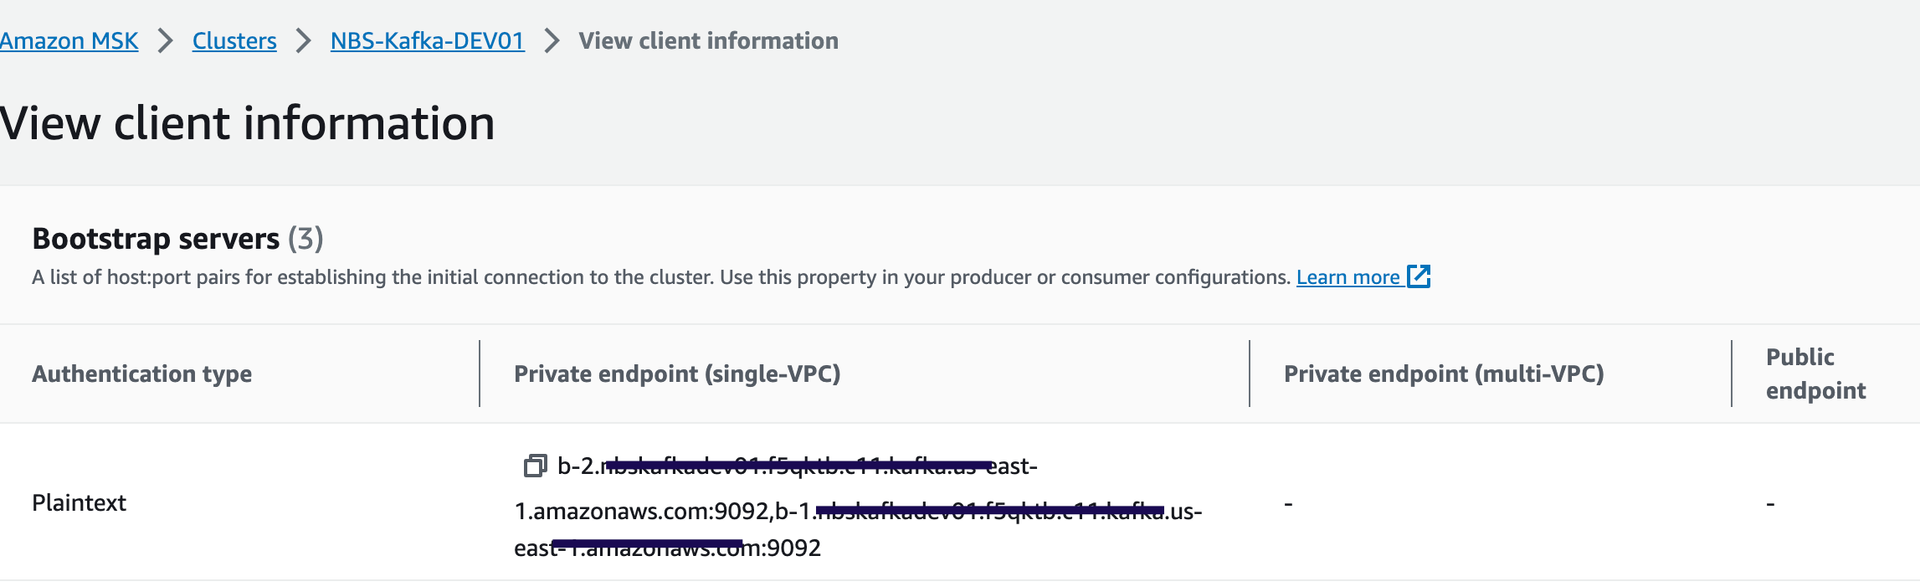
kafka: cluster: "EXAMPLE_KAFKA_ENDPOINT" -
Set
efsFileSystemIdto the file system ID from the AWS console: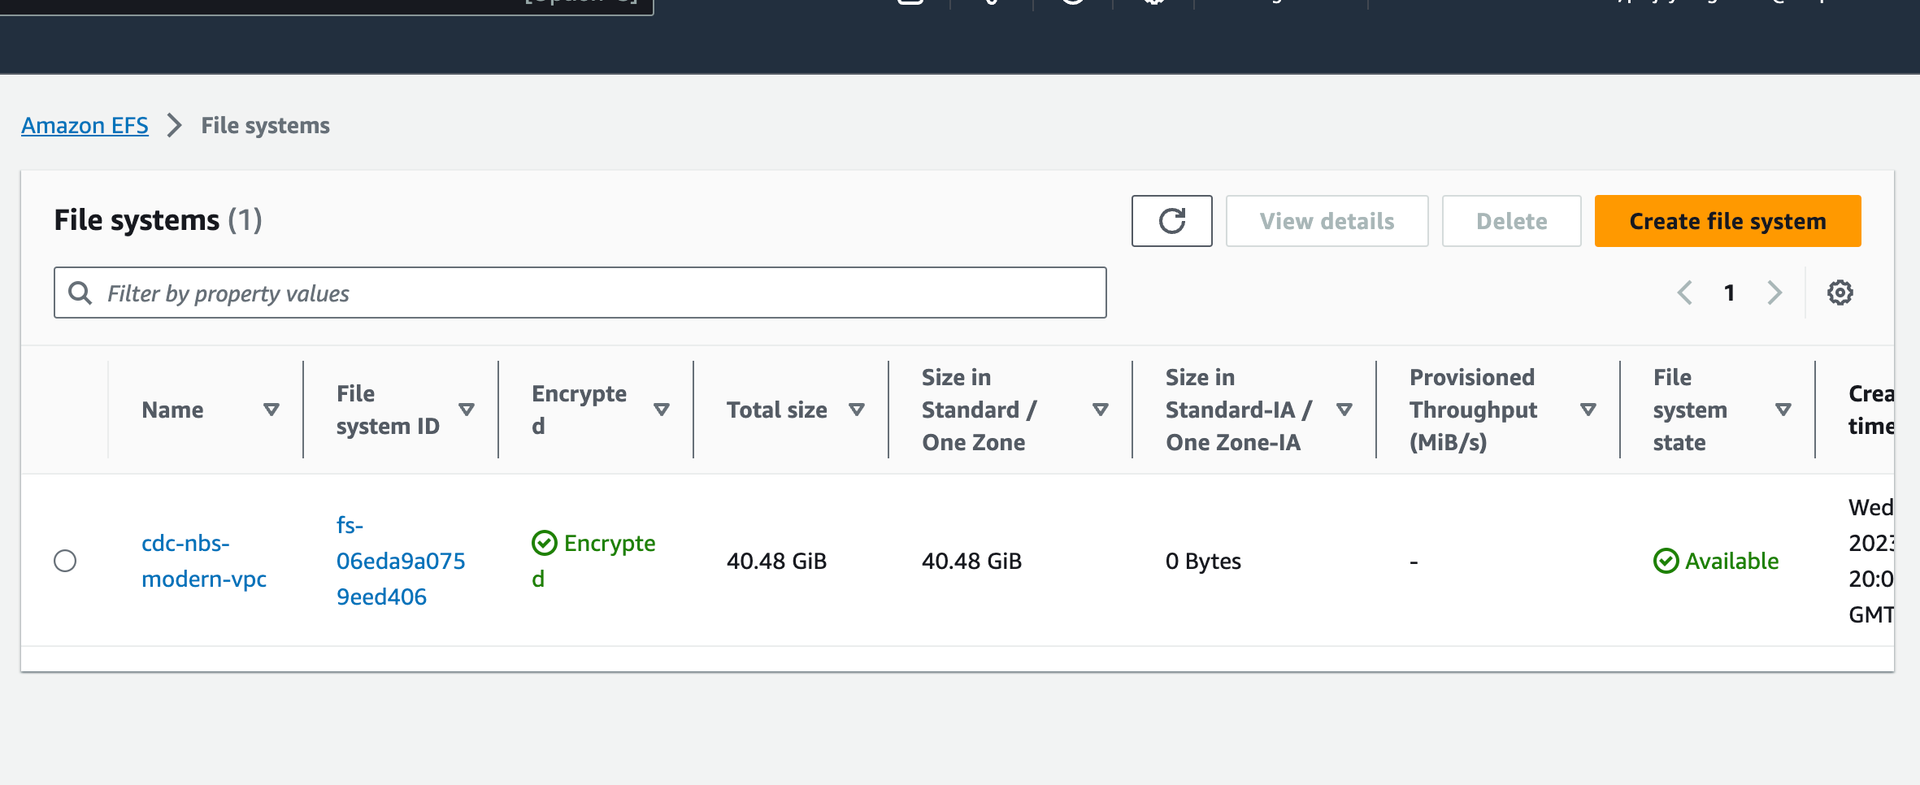
efsFileSystemId: "EXAMPLE_EFS_ID" -
Set the auth URI. In the default configuration this value should not need to change unless the name or namespace of the Keycloak pod is modified:
authUri: "http://keycloak.default.svc.cluster.local/auth/realms/NBS" -
Optional: Configure for manual ELR file drop-off. The data ingestion service can poll ELRs from an external SFTP server. To enable this, set
sftp.enabledto"enabled"and provide the appropriate host, username, and password. If the SFTP server is unavailable or not needed, setsftp.enabledto"disabled"or leave it empty:sftp: enabled: "EXAMPLE_SFTP_ENABLED" host: ""EXAMPLE_SFTP_HOST username: "EXAMPLE_SFTP_USER" password: "EXAMPLE_SFTP_PASS" elrFileExtns: "txt,hl7" filePaths: "/"For more information about SFTP support, see data-ingestion-sftp-support
-
Install the data ingestion service:
helm install dataingestion-service -f ./dataingestion-service/values.yaml dataingestion-serviceConfirm the pod is running before continuing:
kubectl get pods -
Validate the service:
https://<data.EXAMPLE_DOMAIN>/ingestion/actuator/info https://<data.EXAMPLE_DOMAIN>/ingestion/actuator/health -
To enable Swagger for testing (disabled by default in production), set
springBootProfiletodevundercharts/dataingestion-service/values.yaml:https://<data.EXAMPLE_DOMAIN>/ingestion/swagger-ui/index.html#/
Next steps
Continue to Wildfly server.